Create an Order
Create an order to sell products to a customer. Products that are added to an order are called order items. Once an order is completed, the order items are converted into services, which are found on the customer's billing account.
You can either create, configure, and confirm a new order from the Create Order window (described below), or your can save a new order as a draft at any point during the order creation process. While the order is in Draft status, you can navigate away from the order without losing your progress. You can then return at a later time to edit, confirm, or void the order.
The order is automatically saved as a Draft order as soon as you click the Next button on the Create Order window, even if you click away from the Confirm Order window. However, if you click away from the Create Order window without clicking either the Save Draft or Next button, the order is not saved.
The advantage to saving the new order as a Draft is that it allows you to edit or add order items (refer to Draft Orders). You can also configure or change details about the order item, such as a recurring or one-time price, description, usage rules, and more.
Some order items will require additional configuration that is only available when the order is saved as a draft.
If you are adding both a Subscription (parent) and a related Add-On (child) product, ensure that both of these products have a recurring price that has the same currency and Recurrence Period (day, month, year, etc.). You will not be able to complete the order if those prices do not match. Refer to Product Relationshipsfor more information on product relationships and to Product Pricing for more information on creating recurring prices.
Complete the following steps to create an order:
-
Select Customer Billing from the Gotransverse application menu
 .
.You may see a Customers and an Accounts tab or just the Accounts window, depending on the value for the Allow Multi-Customer Accounts Billing system setting. The Allow Multi-Customer Accounts system setting must be set to True to see both tabs. If this system setting is set to False, you will only see the Accounts window while in the Customers module. Refer to System Settings for more information about configuring system settings.
-
Select a customer from the list or search for a customer from the Search field to open the Customer Summary window.
To quickly access a
 icon on the title bar
Customers Window
Click the
 icon in the left pane to hide it. Click the
  icon to open it.
You can manage which columns display in any table with a Configure or Columns button by clicking the button and selecting desired columns. In addition. If the table includes a Filter button, you can filter the table contents. If the table includes an Export button, you can export visible table contents (up to 50) to a CSV (comma-separated values) file. Refer to Data Tables for more information about using these features.
-
Select a custom to open the Customer Summary window.

Customer Summary Window
-
On the Customer Summary window, complete one of the following actions:
-
For the account you wish to create an order, click the ellipsis
 icon under the Actions column and select Create Order to open the Create Order window. Skip to this step.
Create Order Option
-
OR, select an account under the Accounts detail tab to open the Account Details window and select Create Order from the Account drop-down menu to open the Create Order window.

Create Order Option
-
-
On the Create Order window, complete the required and relevant fields:
Click Configure Fields in the upper-right corner to select any custom fields you want to display when editing an order.

Create Order Window - Order Header Fields and Configure Fields Button
The Invoicing Service Group column will only display if you have this feature active on your tenant. Refer to Invoicing Service Groups for more information about this feature.
-
Order Date — Select an order date. The default is the current date. The date can be backdated to the account creation date or the oldest open bill cycle, if needed.
-
PO Number — Enter the customer purchase order number.
-
Referral — If available, enter how the customer was referred to your company for this order, services, or products. For example, a person or company name.
-
Email Receipt — Select if a customer wants to receive an order confirmation email. Email templates are configured with Notification Templates in Setup application (refer to Notification Templates).
-
Notes — Enter additional information about the order.
-
Invoice Order checkbox — Select to generate an invoice immediately after the order confirmation. This creates an Invoice On Order invoice type (refer to Bill Batches for more information about invoice types).
Invoices can be generated after order confirmation for orders that only include One-Time products.
-
Provide Invoice Number — This field displays and is required if you select the Invoice Order checkbox. You can choose to provide an invoice number instead of using the invoice number auto-generated by Gotransverse. The specified invoice number should be unique, such as a number with a prefix, and cannot duplicate an existing invoice number.

Create Order Window - Provide Invoice Number Field
If you do not populate the Provide Invoice Number field or remove the invoice number before finalizing the order, the invoice number will be based on the next invoice number in the auto-generated sequence.
-
Order Custom Fields — Click the Configure Fields drop-down list to view any Order custom fields available. Select the custom fields you would like to add to the order header and enter information as needed. If you had previously selected one or more Order custom fields, they would display for each new order. Custom fields are managed in the Setup application’s Custom Fields Module.

Configure Fields Drop-down List for Order Custom Fields
-
-
In the Order Items section of the Create Order window, add order items to the order by selecting products from the product catalog. You can select one or more products at a time.
Search for products using one of the following methods:
-
Search for a product based on the name in the Product Name search field. Select the product from the drop-down list. You can also start typing the name of the product to filter the listed products.
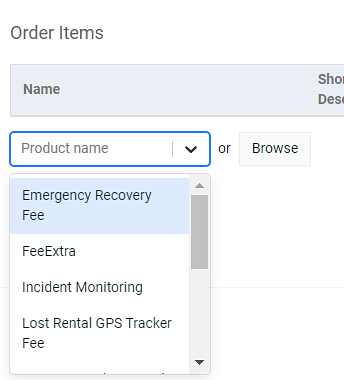
Create Order Window - Product Name Search
-
OR, search for a product using additional filters by clicking the Browse button to open the Browse Products window. Select one or more products to add to the order by selecting the checkbox next to the product name and then clicking the Add to Order button.

Browse Product Window
If you use the Avalara Communications Tax processor, your Browse Products window will display the tax mode (Tax Exclusive or Tax Inclusive) within the price shown in the List Price column. The list price and Tax Inclusive or Tax Exclusive will also be shown in the subsequent order windows.

Browse Product Window - Avalara Communications Tax
The following filters are available when browsing the product catalog:
-
By Price List: Start typing the price list name or select it from the drop-down list. Multiple price lists can be selected.
-
By Name: Start typing the product name.
-
By Type: Start typing the product type or select it from the drop-down list. Multiple types can be selected.
-
By Category: Start typing the product category or select it from the drop-down list. Multiple categories can be selected.
-
By Tags: Start typing the associated product tag or select it from the drop-down list. Multiple tags can be selected.
Click the Reset button to clear the filter criteria.
-
If you select a product and then move through pages or change filters and select other products, every selected product will be added to the Create Order window.
-
-
Repeat the previous step to add additional products as needed.
-
On the Create Order window, configure the available required and optional fields for the order items. Additional required and optional configurations are completed after the order is saved with a Draft status. Refer to Draft Orders for more information on how to configure order items.
The fields displayed and which fields are optional or required for an order item are defined by the type of product and the way the product is set up in the product catalog.

Create Order - Order Items Added
The following fields may be available to edit in the Order Items section:
-
Short Description — Enter or overwrite the short description for the order item that will appear on the service and invoice.
-
Parent Service — Required if the product selected has a parent service. Select the required parent service for Add-On products. The parent service can be another order item on the same order or an existing service on the same billing account. You must add the parent service to the order items before it is available in the drop-down list. To see if a product has a parent or related product, open the Product Information window for a product and select the Related Products detail tab (refer to Product Relationships).

Select Parent Service
The Add-On product must have a recurring price that has the same Recurrence Period and currency as the parent Subscription product linked to it. Refer to Product Pricing for more information on creating and managing product prices.
-
Invoicing Service Group — Select an Invoicing Service Group to which to add this order. Only available for Subscription and One-Time products. Optional field.
-
List Price — Select a price for any Subscription product with more than one price or available.
-
Order Price — Enter a different price to override the price of the order item. Products must have Override Price enabled to change the price of an order item. Refer to Products Module for more information about this setting.
-
Quantity — Enter a different quantity for any One-Time products.
Click the delete icon
 next to any order items you want to remove.
 -
-
After adding all items and configuring them as needed, click either the Save Draft or Next button on the Create Order window to open the Review and Confirm window.
The order is saved as a Draft order as soon as you click the Next button, even if you click away from the Confirm Order window.
NOTE: If you use the Avalara Communications Tax processor, your Order Items section will include the tax mode (Tax Exclusive or Tax Inclusive) within the price shown in the List Price column.

Order Items Section - Avalara Communications Tax Processor
-
On the Review and Confirm Order window, you can either confirm the order as it is or make changes.
If an
 displays in the Actions column, the product requires additional configuration before you can confirm the order.
If you do not see a column in the data table, click the Configure button and select the desired columns.
-
Click the
or  in the Actions column and select the item. Items in red text are items that need further input before you can confirm the order.
Refer to Order Item Configuration for more information on completing configuration for items.

Review and Confirm Order Window - Order Item Expanded Detail
-
Review the order for accuracy. Click the
 icon next to an order item to view the order item configuration.
Review and Confirm Order Window - Order Item Expanded Detail
-
Click the Review & Confirm button to open the Confirm Order window.

Confirm Order Window
You will not be able to edit or add order items to a Confirmed order. Some order item configuration is done after the order has been saved as a Draft. For more information on configuring order items, refer to Order Item Configuration.
-
To make any changes, click the Back to Order link at the top of the window to make changes on the Review and Confirm Order window. The order is automatically assigned an order number and saved with a Draft status. On the Review and Confirm Order window, you can confirm the order as is, void the order, send an email receipt, or confirm the order, as well as configure, delete, or add order items. Refer to the Related Topics for links to the topics for each of these actions.
-
Click Confirm Order to complete the order and open the Order Details window.

Order Details Window
If you use the Avalara Communications Tax processor, your Order Details window will include the tax mode for both recurring and one-time prices in the Recurring Tax Mode and One-Time Tax Mode columns, respectively.

Order Details Window - Avalara Communications Tax Processor
Topic updated: 04/2025.