Create Lockbox File Setup
You can create a lockbox file setup to establish a lockbox file process on the Payment Matching Setup window.
Unlike the bank account setup, where you also need to create transaction types, a Check Payment transaction type is automatically created for new lockbox file setups. The Check Payment transaction type is the only available transaction type for lockbox file transactions.
IMPORTANT: Before creating a new Lockbox File Setup the following items need to be available or created:
-
Lockbox Account Name — Lockbox Account Name used to match lockbox file header data.
-
Lockbox Account Number — Lockbox Account Number used to match lockbox file header data.
-
Holding Account Number — A billing account that can be used as a holding account where transactions that have not been automatically matched by Payment Matching application can be posted. Refer to Create Customer and Associated Billing Accounts for more information about creating a holding billing account if needed.
Contact Gotransverse Technical Support if you need help configuring lockbox setup information for the Payment Matching application.
-
Select Payment Matching from the Gotransverse application menu
 .
. -
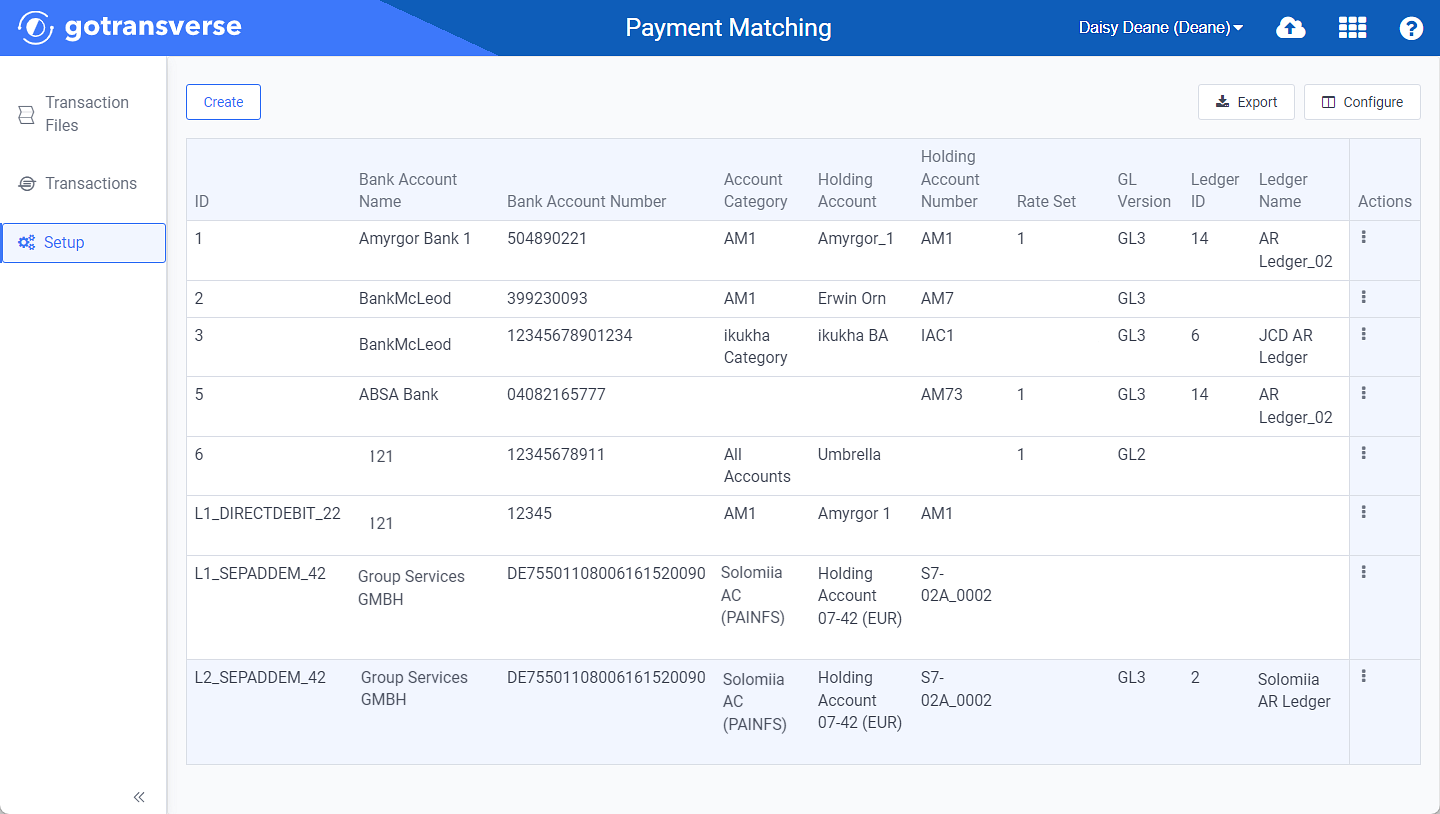
Click Setup in the left pane. The Setup window displays a list of bank account, responsive file, and lockbox file setups.

Setup Window
Click the
 icon in the left pane to hide it. Click the
  icon to open it.
You can manage what columns are displayed in the table by clicking the Configure button and selecting column names. For AR transactions, you can display mapped tags from the transaction file as columns in the table.
You can also filter each table by clicking the Filter button to select those transactions you wish to see.
-
Click the Create button and select Lockbox File Setup to open the Create Lockbox File Setup window.

Create Lockbox File Setup Option
-
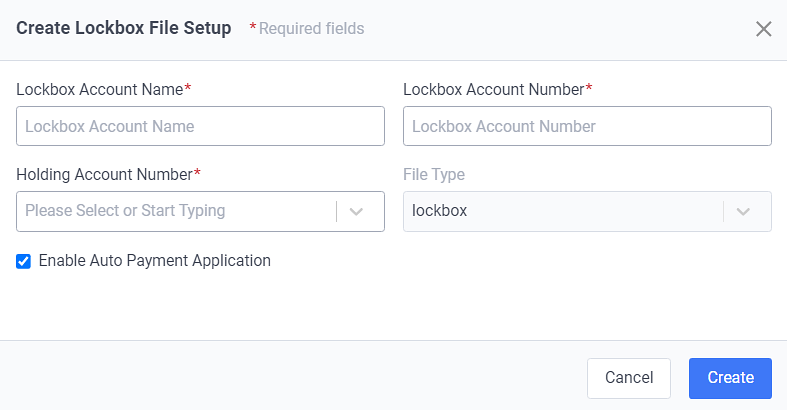
On the Create Lockbox Setup window, complete the required and relevant fields:

Create Bank Account Setup Window
Required fields are marked with an asterisk.
-
Lockbox Account Name* — Enter the lockbox account name.
-
Lockbox Account Number* — Enter the lockbox account number.
-
Holding Account Number* — Select the holding account from the drop-down list.
-
File Type — This filed is automatically completed with lockbox.
-
Enable Auto Payment Application checkbox — Select to apply auto payment for this setup.
-
-
Click Create. The lockbox account is added to the list of setups on the Setup window.
Topic updated: 10/2024.