Add Customer Account Addresses
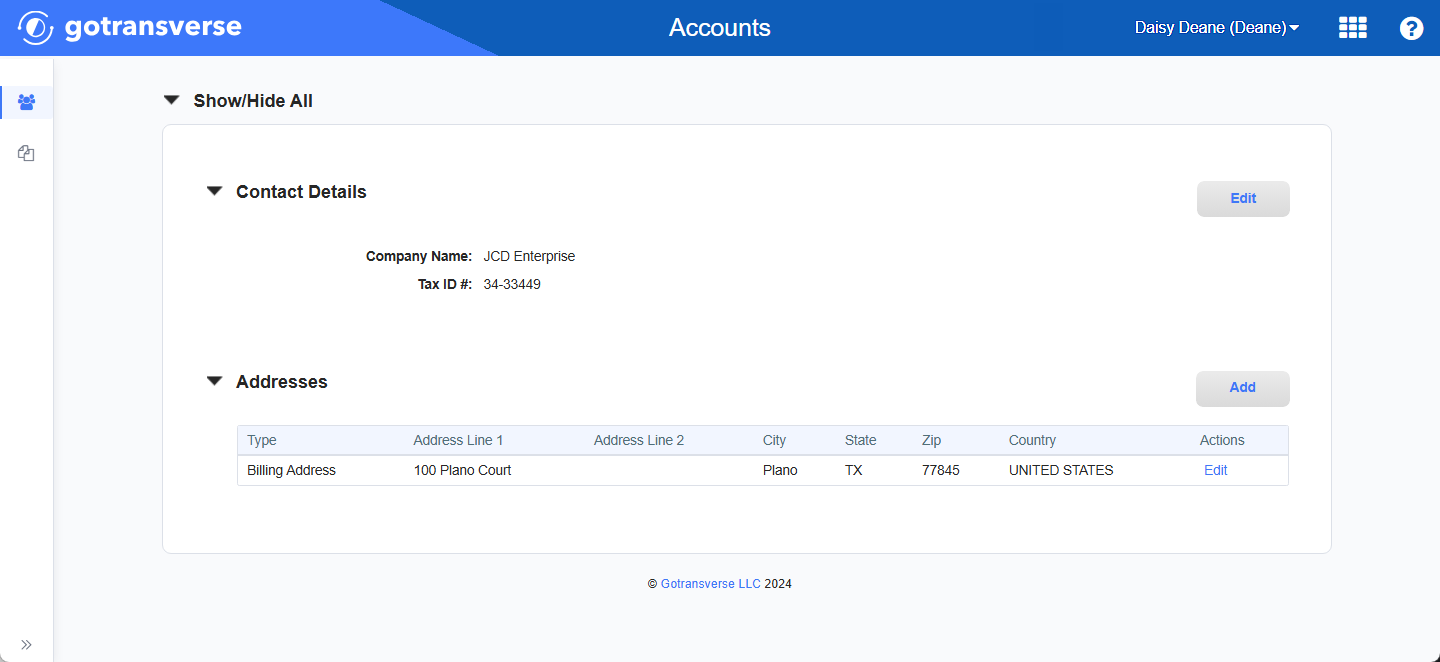
The Contact Details window lists all addresses associated with the customer account, such as a billing, service, and shipping addresses.
Addresses, email addresses, and phone numbers for an account are also available on an Account Details window that can be accessed via the Account Name active link on any of the billing account’s Account Details window. Refer to View Billing Account Information for more information.

Billing Account Details Window - Account Name Active Link
Addresses have no expiration date. Therefore, the address that is active on the account is considered the current address. You can define the following types of addresses for an account:
-
Shipping
-
Service
-
Billing
When you create either a personal or enterprise customer billing account, you can add an email address, up to three different addresses, and up to four different phone numbers. You can add or edit any of those addresses after the account is created.
Complete the following steps to add new postal addresses for a customer for either a personal or enterprise account:
-
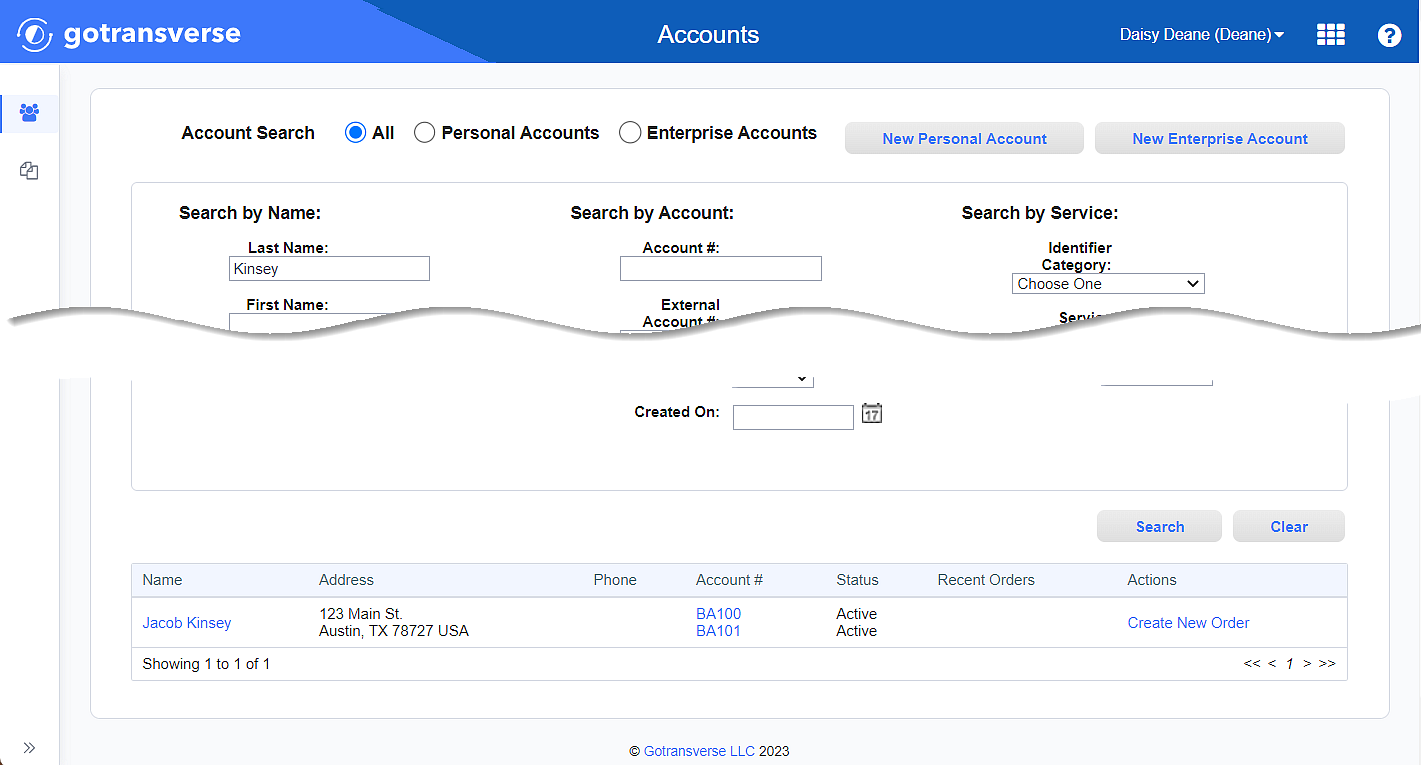
Perform an Account Search Module to locate the billing account.

Account Search Results
-
Click the Name active link under the Name column to open the Contact Details window for the customer.
This window is similar for both a personal and an enterprise account.

Contact Details Window
Click the
 icon in the left pane to hide it. Click the
  icon to open it.
 -
On the Contact Details window, click the Add button above the Addresses section to open the Add Address window.
-
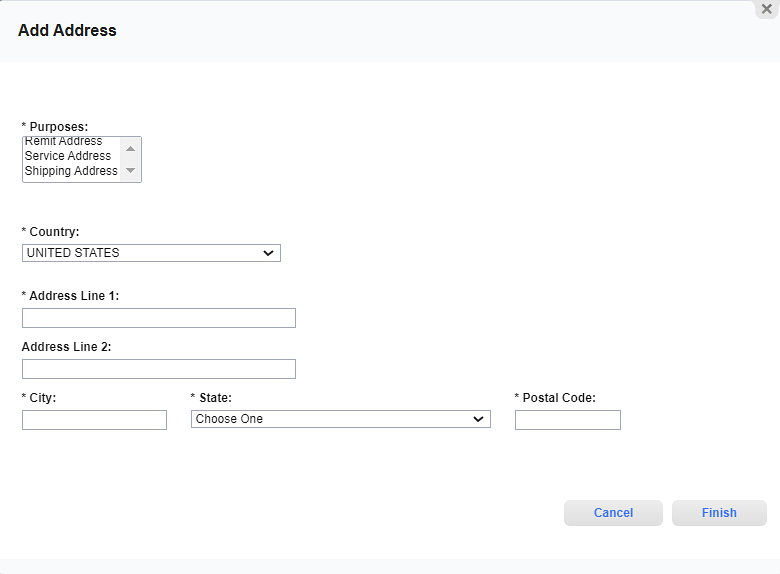
On the Add Address window, enter the required and relevant information:

Add Address Window
Required fields are marked with an asterisk.
-
Purposes* — Select either Billing Address, Service Address, or Shipping Address, or a combination of the available options to identify the address. You can select more than one type by pressing and holding the CTRL key when selecting additional types. If you have already created one or more of these addresses, only the type of address that you have not created will display in the list. You can only create one entry for each address type.
-
Country* — Select the country from the drop-down list. The default value in this box is United States.
-
Address Line 1* — The new or updated address.
-
Address Line 2 — Add any additional address information in this field.
-
City* — The city in which the address is located.
-
Region or State* — Enter the name of the state, province, or region in which this address is located. If the country you selected earlier is the United States, Canada, or Mexico, select the state, province, or region in which the address is located. For other countries, enter the name of the state, province, or region in which the address is located.
-
Postal Code* — Enter the postal code.
-
-
Click Finish. The address is saved and shown in the Addresses section.
-
If desired, repeat this procedure to add, change, or update additional postal addresses for different purposes. For example, if you added or updated the Billing postal address, you may want to update the Shipping postal address if it is a different address.
Topic updated: 01/2024.