Add Address on Account Details Window
If your tenant is configured with the Allow Multi-Customer Accounts system setting set to False, you can add addresses, phone numbers, and email addresses on an Account Details window.
You can create three addresses for a customer account: Billing, Service, and Shipping.
Complete the following steps to add an address to a customer account from an Account Details window:
-
Select Customer Billing from the Gotransverse application menu
 .
.
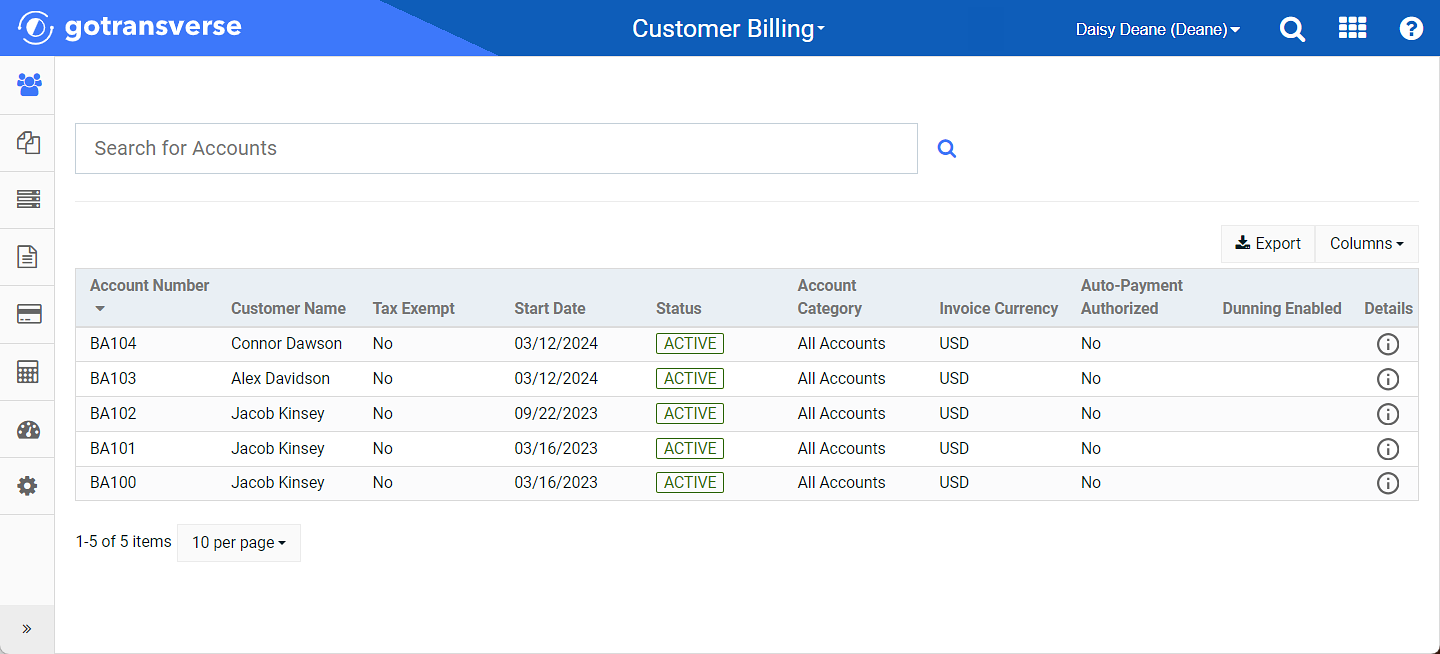
Customers Window
-
Select an account from the list or search for a customer from the Search field to open the Account Details window.
To quickly access a billing account, click the
 icon on the title bar and enter part of the billing account name.You can also bookmark regularly-used pages. Refer to Search Feature for more information.
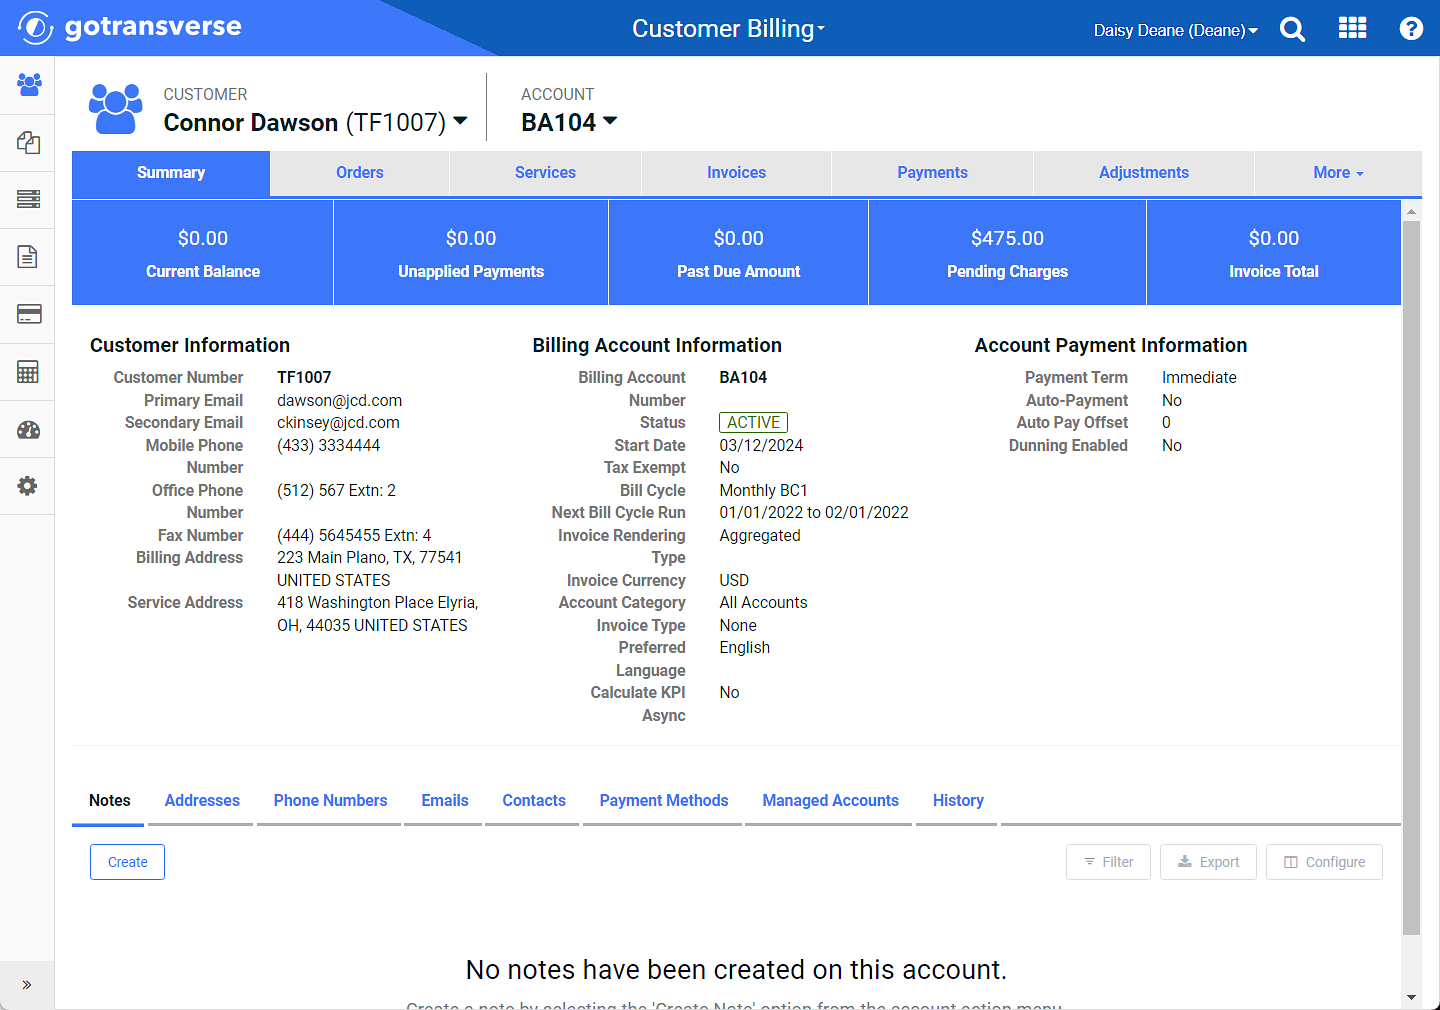
Account Details Window
You can manage which columns display in any table with a Configure or Columns button by clicking the button and selecting desired columns. In addition. If the table includes a Filter button, you can filter the table contents. If the table includes an Export button, you can export visible table contents (up to 50) to a CSV (comma-separated values) file. Refer to Data Tables for more information about using these features.
-
On the Account Details window, click the Addresses details tab.
-
Click the Create button to open the Create Address window.
-
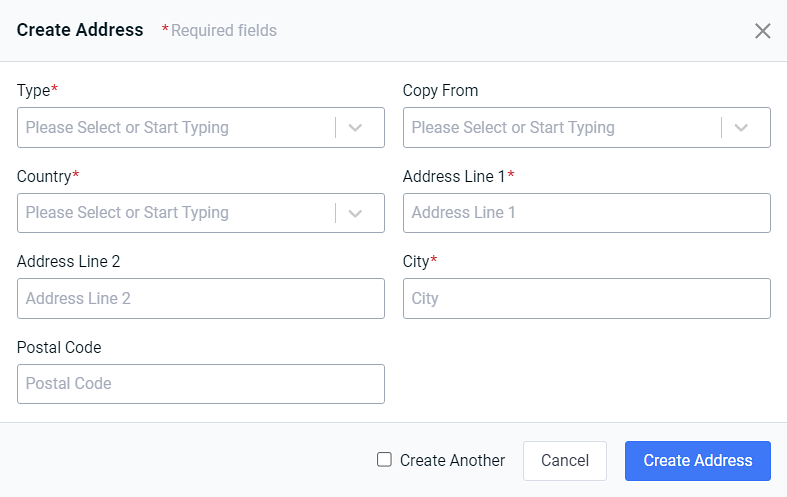
On the Create Address window, complete the required and relevant information.

Create Address Window
Required fields are marked with an asterisk.
-
Type*: Select an address type from the drop-down. If no addresses have been created, you select from Billing, Service, or Shipping. Once a type of address is created, the type is not available for selection from the drop-down list. For example, if you already created a Billing address, Billing will not display in the drop-down list.
-
Copy From: You can select information from a previously-created address to use for this new address. If available, select an address type from the drop-down-list or enter the first couple of letters of the address type to populate a drop-down list. Only addresses that have been created will display in the list. If you select a previously-created address, the remaining fields automatically populate.
-
Country*: Enter the country from the drop-down-list or enter the first couple of letters of the country to display related names in the drop-down list.
-
Address Line 1*: Enter the first line of the address.
-
Address Line 2: Enter the second line of the address, if necessary.
-
City*: Enter the city.
-
Postal Code: Enter the postal code for the address.
-
-
Incorporated and P-Code Override checkbox — Select the checkbox to override the P-Code and/or Incorporated as configured on the Avalara Communications tax processor. When selected, Gotransverse will not periodically update the P-Code. Refer to Avalara Communications Tax Processor Integration for more information on these features.
-
P-Code — Enter a P-Code to override the P-Code assigned.
-
Incorporated checkbox — Select the checkbox to designate this address as incorporated.
If you do not select the Incorporated and P-Code Override checkbox nor add a P-Code nor select the Incorporated checkbox, Gotransverse will update these items when you save the address.
-
Click Create Address OR click the Create Another checkbox to save this address and open a new Create Address window.
If all address types have been created, the Create Another checkbox will not display.
For Avalara Communications tax processor users only, the Create Address window for Service type will include these additional fields:

Create Address - Service Type for Avalara Communications Tax Processor
Addresses display under the Addresses detail tab. You can Edit Address on Account Details Window or Delete Address on Account Details Window, if needed.
Topic updated: 04/2025.