Configure HTTP Request Operation for Payment Notifications
Payment notifications can also be configured from the Receivables application’s Payment Rules and Actions Module. Refer to Payment Actions for more information on how to access the Action Configuration window from the Payment Rules and Actions module.
Before you can configure a notification with an HTTP request operation, you must first configure an HTTP external application with access credentials to the site. Refer to External Applications for more information on configuring an FTP or HTTP external application.
Payment notifications include the following types:
-
Credit Adjustment
-
Remaining Payment
-
Payment Retry
These notifications are only for payment retry schedules and not for the manual payment retry functionality.
-
Refund
-
Payment Cancellation
-
One Time Payment
-
Auto-Payment
Each type includes the following basic configuration settings:
-
Enable Operation checkbox
-
Account Category selector
-
External Application selector
-
URL selector
-
Http Method selector
-
Content Type text field
-
Date Format text field
-
Add New Header Name/Value option
-
Payload section
The different payment notifications have the following unique settings:
-
Credit Adjustment:
-
Adjustment Reason selector
-
-
Remaining Payment Amount:
-
Payment Method
-
-
Payment Retry and Refund:
-
Trigger selector
-
Payment Method selector
-
-
Payment Cancellation:
-
Payment Method selector
-
Billing Account Custom Field selector
-
-
One Time and Auto-Payment:
-
Trigger selector
-
Payment Method selector
-
Billing Account Custom Field selector
You can also configure an HTTP or email request operation for a Service Agreement notification in the Products application’s Agreement module. Refer to Agreement Notification Actions for more information.
Complete the following steps to add or edit an HTTP request operation for a Payment notification:
-
Select Setup from Gotransverse application menu
 .
. -
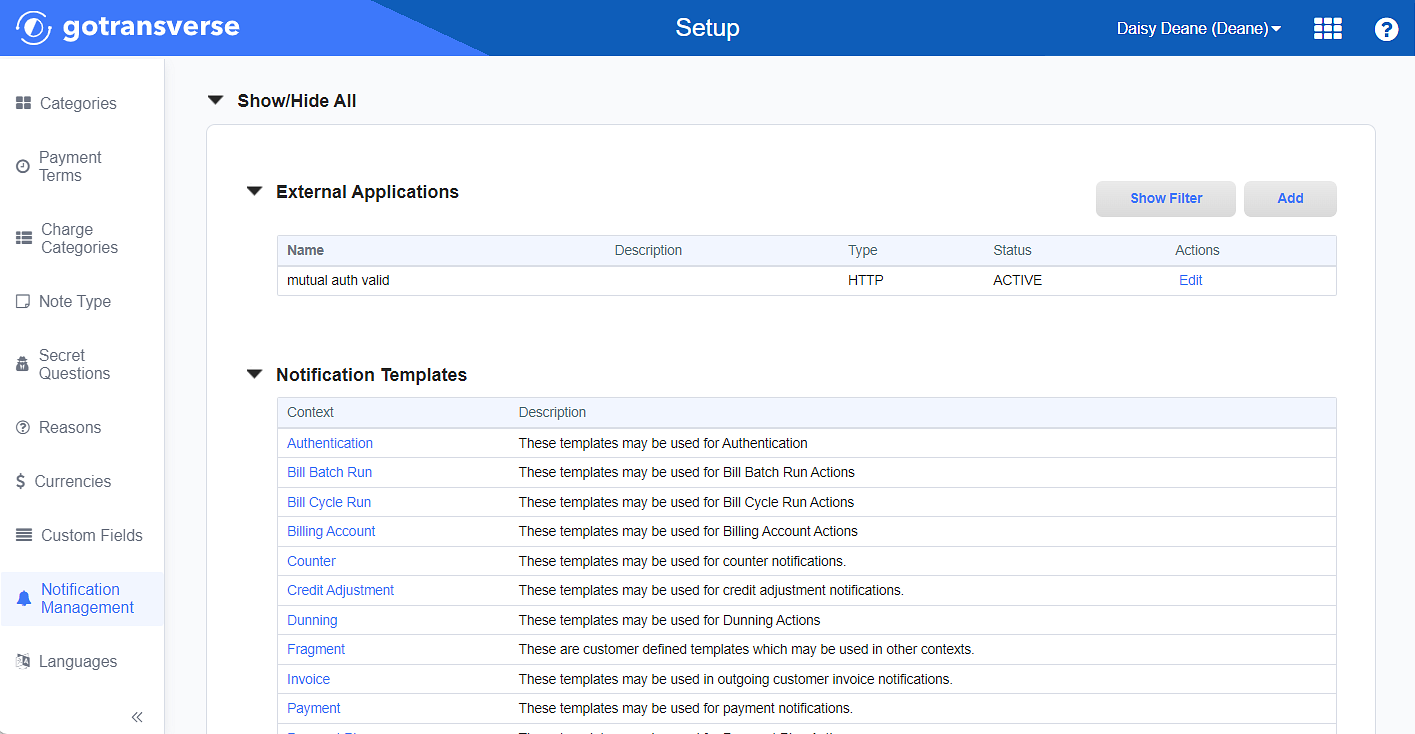
Click Notification Management in the left pane.

Notification Management Window
Click the
 icon in the left pane to hide it. Click the
  icon to open it.
 -
In the Payment Notifications section, click the name of the notification you want to configure to open the Action Configuration window for that notification.

Payment Notifications Section
-
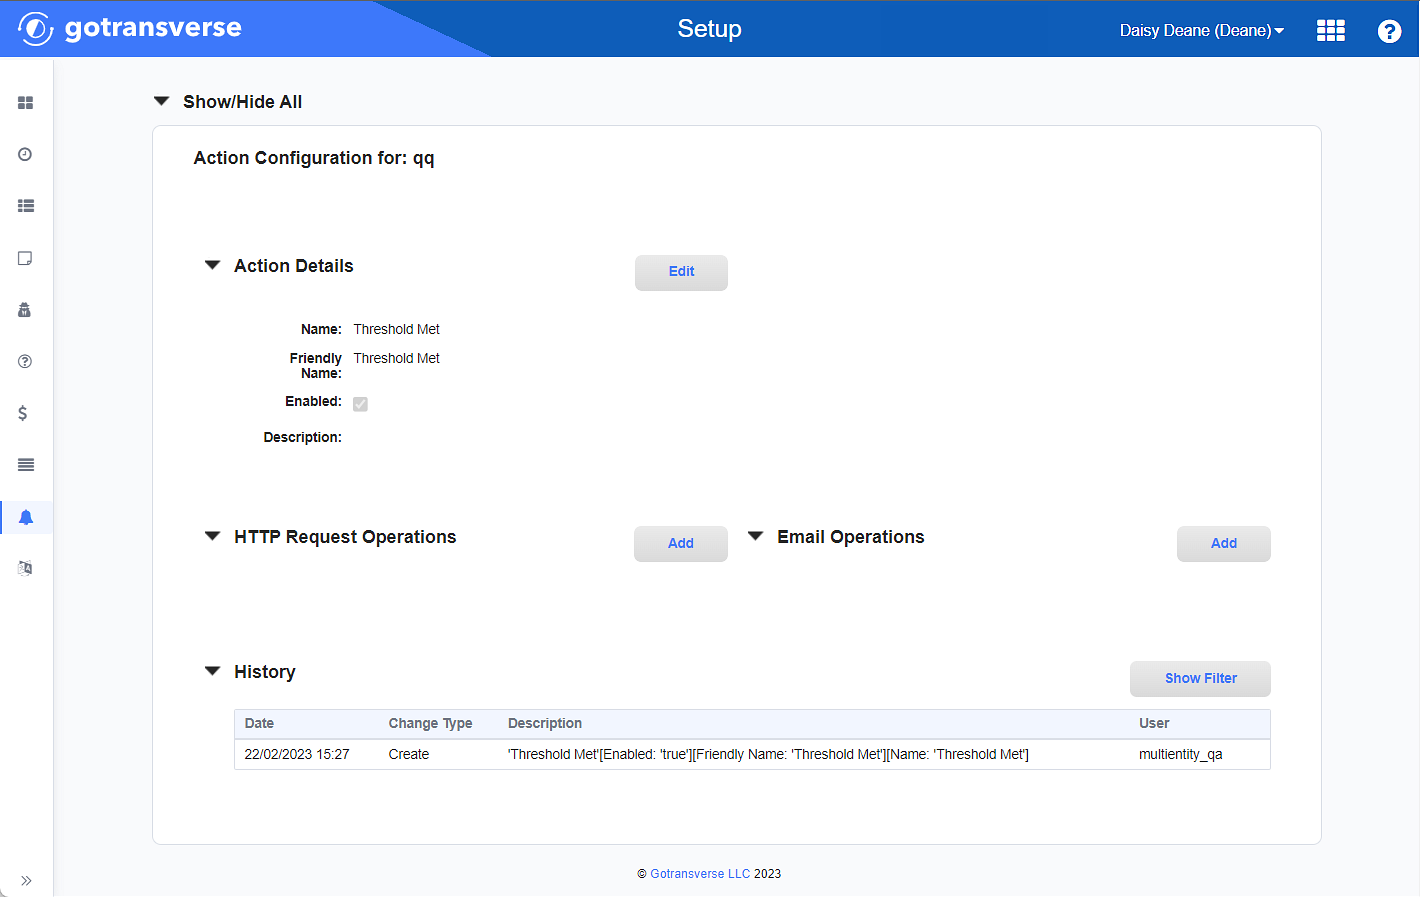
On the Action Configuration window, in the HTTP Request Operations section, click the Add button, or click Edit in the Actions column for that operation to edit the operation. Both actions open the Configure HTTP Request window.

Action Configuration Window
-
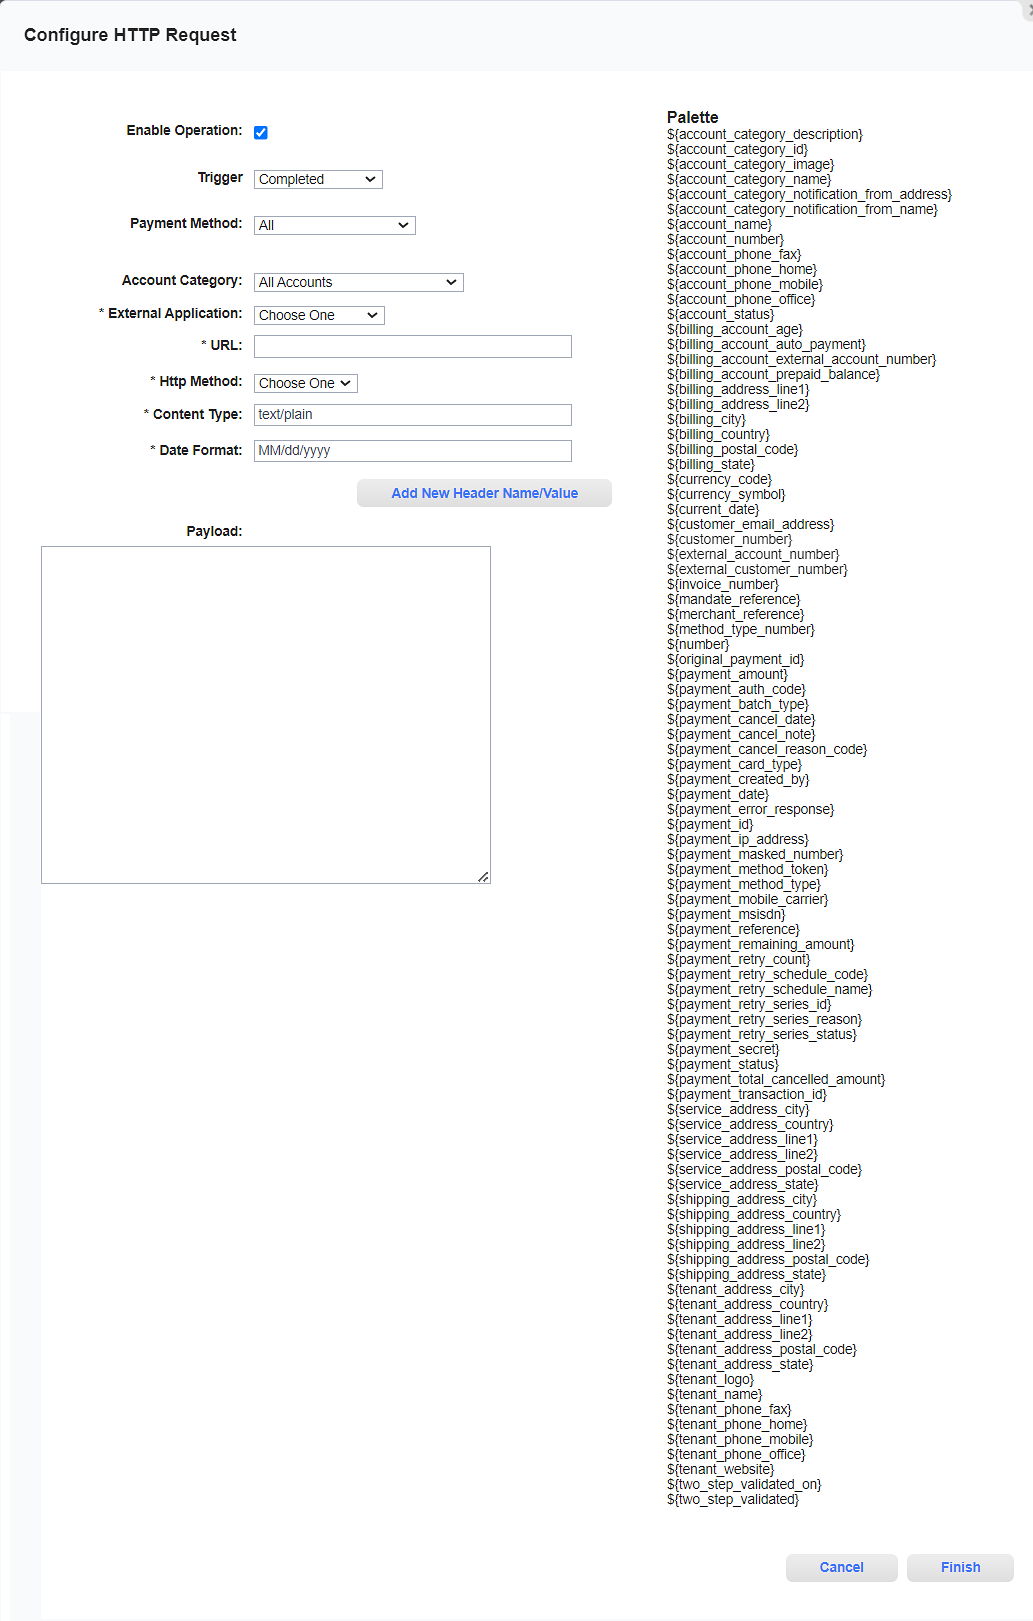
On the Configure HTTP Request window, enter the required and relevant information:
The fields in the configuration window are based on the type of Payment notification. The example shown is an example of a Configure HTTP Request window for Payment Retry.

Configure HTTP Request Window
Required fields are marked with an asterisk.
-
Enable Operation checkbox — Indicates whether the operation is on and available for use. Select or deselect the checkbox to enable or disable this action as follows:
-
Selected: The request will occur.
-
Not selected: The request will not occur. This request can be enabled later. Any request operation can be enabled at any time after they are created.
-
-
Trigger — For Payment Retry, One Time Payment, Refund, and Auto-Payment. The type of call this action makes. Select an option from the drop-down list: POST, GET, or DELETE.
-
Payment Method — For Remaining Payment Amount, Payment Retry, Payment Cancellation, One Time Payment, Refund, and Auto-Payment. Select a payment method from the drop-down list. Payment methods that have been configured for you tenant will display in the list. Payment methods are managed in the Admin application’s Integration module (refer to Payment Gateways).
-
Adjustment Reason — For Credit Adjustment. Select a Reason for the adjustment. Reasons are created and managed in the Setup application. Refer to Reasons Module for more information.
-
External Application* — Select an HTTP external application that you configured in External Applications.
-
URL* — Enter the URL of the website to access. Access to an external website is configured in the External Applications module.
-
Http Method* — The type of call this action makes. Select an option from the drop-down list: POST, GET, or DELETE.
-
Content Type* — Enter the provided content type, if needed. You can enter up to 255 characters.
-
Date Format* — Change the provided format if needed. Default is MM/dd/yyyy, which displays the date as 09/24/2023.
-
Add New Header Name/Value — Click this button to display two additional fields, which can be used to add extra content to the header.
If you have added too many Name/Value fields, you can click the Remove Last Header Name/Value button to remove the last set of Name and Value fields.
-
Name*: The header’s name.
-
Value*: The value to be included in the header.
-
-
Payload: Select items from the Palette on the right to add to the Payload text box.
You can highlight a palette item and then drag it to the Payload text box.
-
-
Click Finish to save the request. The HTTP request is added (or updated) in the HTTP Request Operations section of the Action Configuration window.
Topic updated: 04/2024.