Add Custom Field
You can create custom fields to include user-defined information to your accounts, products, orders, services, payment methods, or account categories.
For Product and Service and One-Time custom fields, you must also add and configure these custom fields for a product to be able to see those custom fields when ordering that product. Product custom fields can be configured in either the Products or Product Catalog applications when creating or editing products. However, Service custom fields can only be added to a product in the Products application. Additionally, the product custom field must be enabled to complete this action.
Complete the following steps to add a new account, product, order, services and one-time, payment method, or account category custom field:
-
Select Setup from the Gotransverse application menu
 .
. -
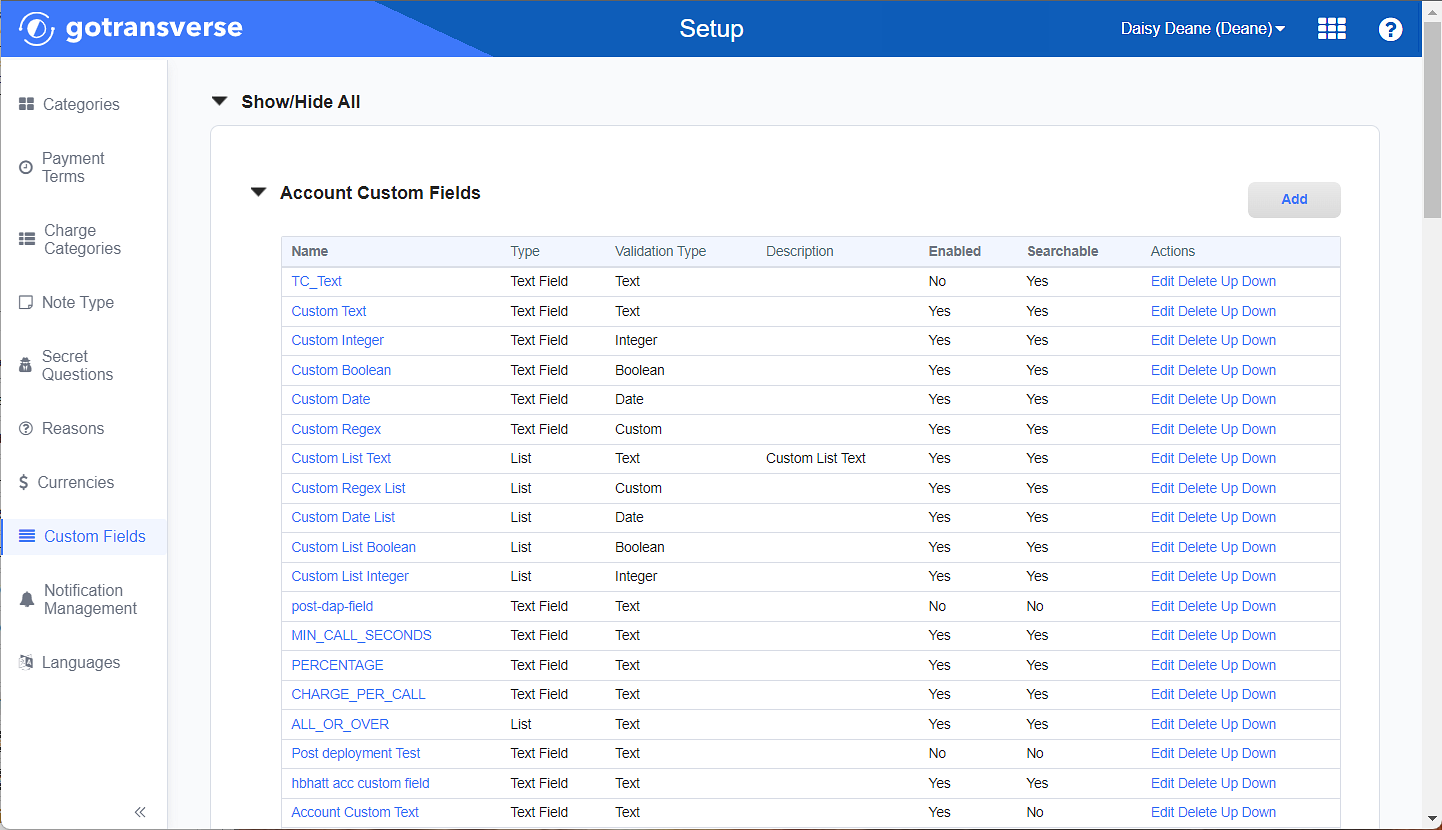
Click Custom Fields in the left pane.

Custom Fields Window
Click the
 icon in the left pane to hide it. Click the
  icon to open it.
 -
In the section for the custom field type you want to add (for example, Account Custom Fields), click the Add button to open the Add Custom Field window.
-
On the Add Custom Field window, enter the required and relevant information:
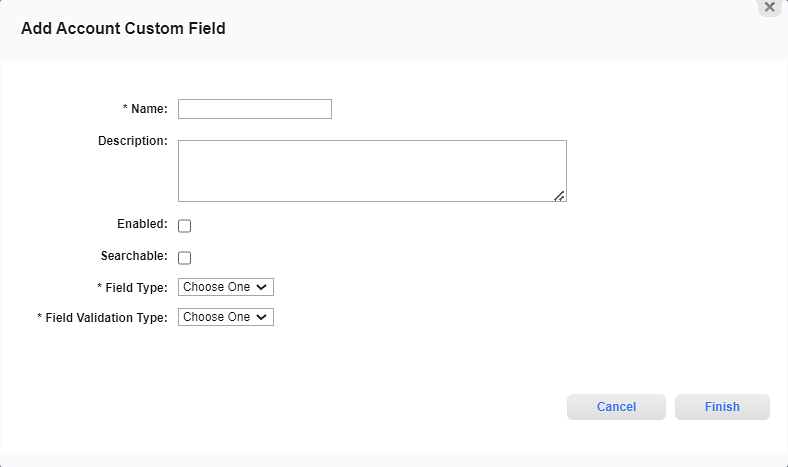
The window that opens depends on the type of custom field you selected. The following is an example of the Add Account Custom Field window. The fields, described below, are included for each custom field type. Exceptions are noted.

Add Account Custom Field Window
Required fields are marked with an asterisk.
-
Payment Method* — Only required for a Payment Method custom field. Select the payment method for which you want the custom field to appear. The custom field will only display when the specified Payment Method is used by a customer.
-
Name* — Enter the name displayed for the custom field, which can be up to 255 characters (including spaces).
-
Description — Enter a description of the custom field.
-
Enabled checkbox — Select the checkbox to display the custom field where appropriate. Clear the checkbox to disable the field.
-
Searchable checkbox — Select the checkbox to make the custom field searchable on the Account or Order Search windows. Clear the checkbox to disable the search option.
-
Field Type* — Select a field type for the custom field:
-
Text: The field is blank and accepts any string of characters.
-
List: The custom field will be a drop-down field with a list of predefined values. The values found in the drop-down list are defined in the Custom Field Details window. Refer to Add List Values for List Custom Field for more information.
-
-
Field Validation Type* — Select the data type used to validate the custom field entry. For example, a Date field accepts only dates formats, a Currency field accepts only monetary data with number values so either a decimal, integer or custom field validation type would be appropriate. Options include the following:
-
Text — No validation is performed on a text string.
-
Boolean — One of two possible values.
-
Decimal —Accepts decimal numbers, such as 3.4.
-
Date — Accepts a date.
-
Integer — Accepts whole numbers.
-
Custom — Also requires a Regex value, which displays when this option is selected.
-
-
Regex* — Required if the Field Validation Type is Custom. Enter the string in regular expression language that will be used to evaluate the custom field entry. An example of a regular expression is [0-9]+(\.[0-9]+)?, which describes a decimal number.
-
-
Click Finish to add the new custom field.
Topic updated: 09/2024.