Create Manual Journal Entries
A manual journal entry (entry) allows you to post transactions without using a posting rule. Transactions from posting rules always involve a billing account, but if you need to make correcting entries between GL accounts, you will need to use a manual journal entry. The manual journal entry lines entered will be posted as transactions. Every entry requires the total amount of debits and credits to be zero, ensuring balanced transactions. Entries can be posted immediately or created as a draft entry, which allows entries to be reviewed later or edited before posting.
Complete the following steps to create a manual journal entry:
-
Select Revenue Management from the Gotransverse application menu
 .
. -
Click AR Ledger in the left pane.
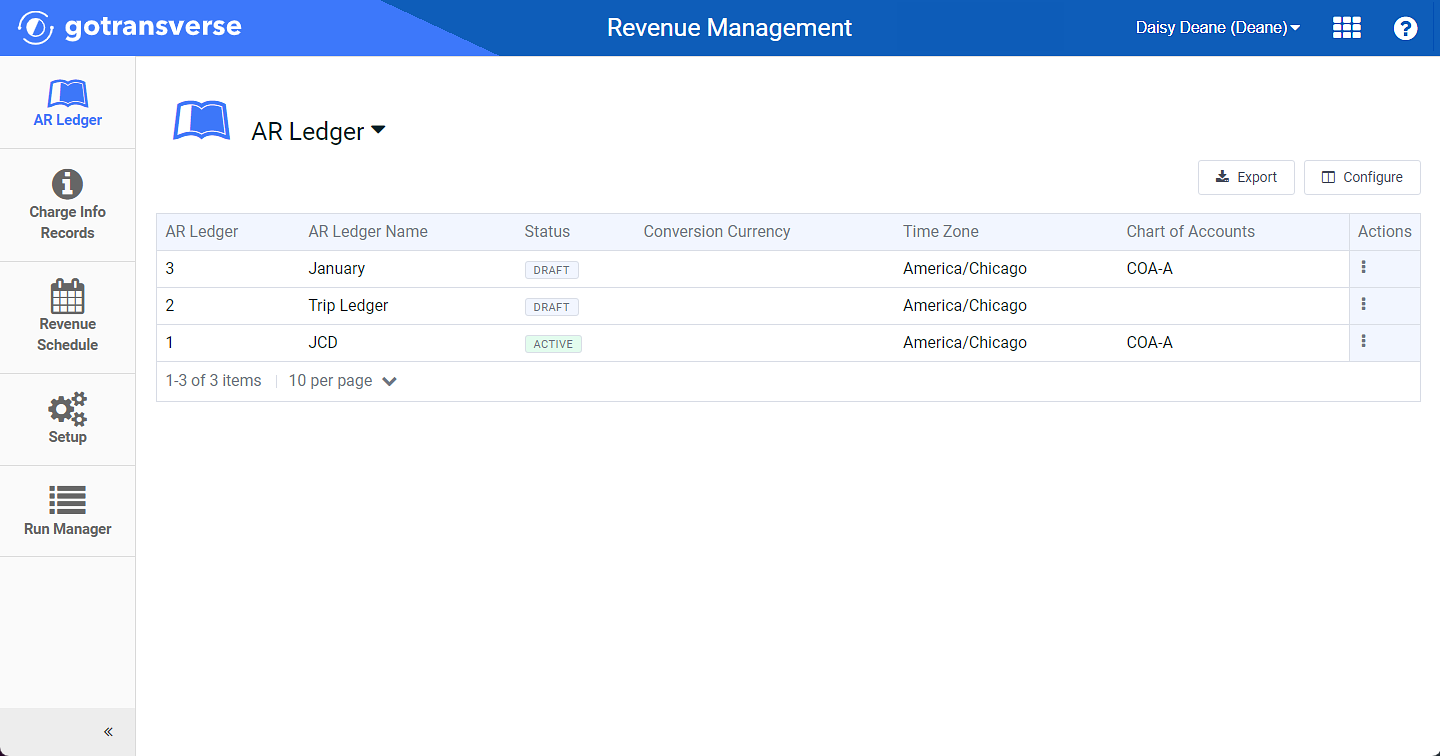
AR Ledger Window
Click the
 icon in the left pane to hide it. Click the
  icon to open it.
You can manage which columns display in any table with a Configure or Columns button by clicking the button and selecting desired columns. In addition. If the table includes a Filter button, you can filter the table contents. If the table includes an Export button, you can export visible table contents (up to 50) to a CSV (comma-separated values) file. Refer to Data Tables for more information about using these features.
-
On the AR Ledger Details window, select Create Manual Journal Entry from the AR Ledger drop-down menu to open the Create Manual Journal Entry window.
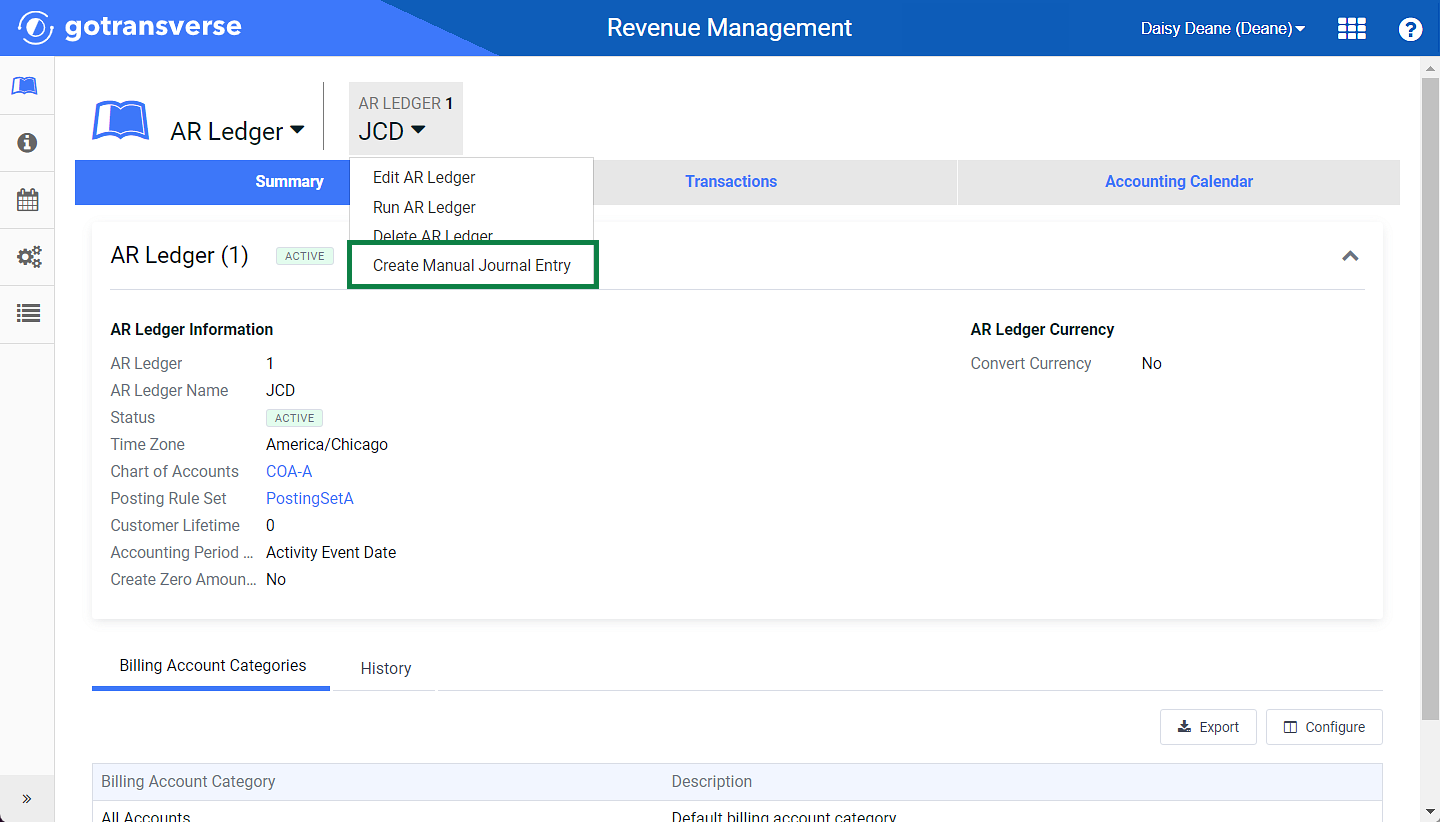
AR Ledger Drop-down Menu - Create Manual Journal Entry Option
-
On the Create Manual Journal Entry window, complete the relevant fields in the top section. This information will carry over to all transactions resulting from the manual journal entry lines.
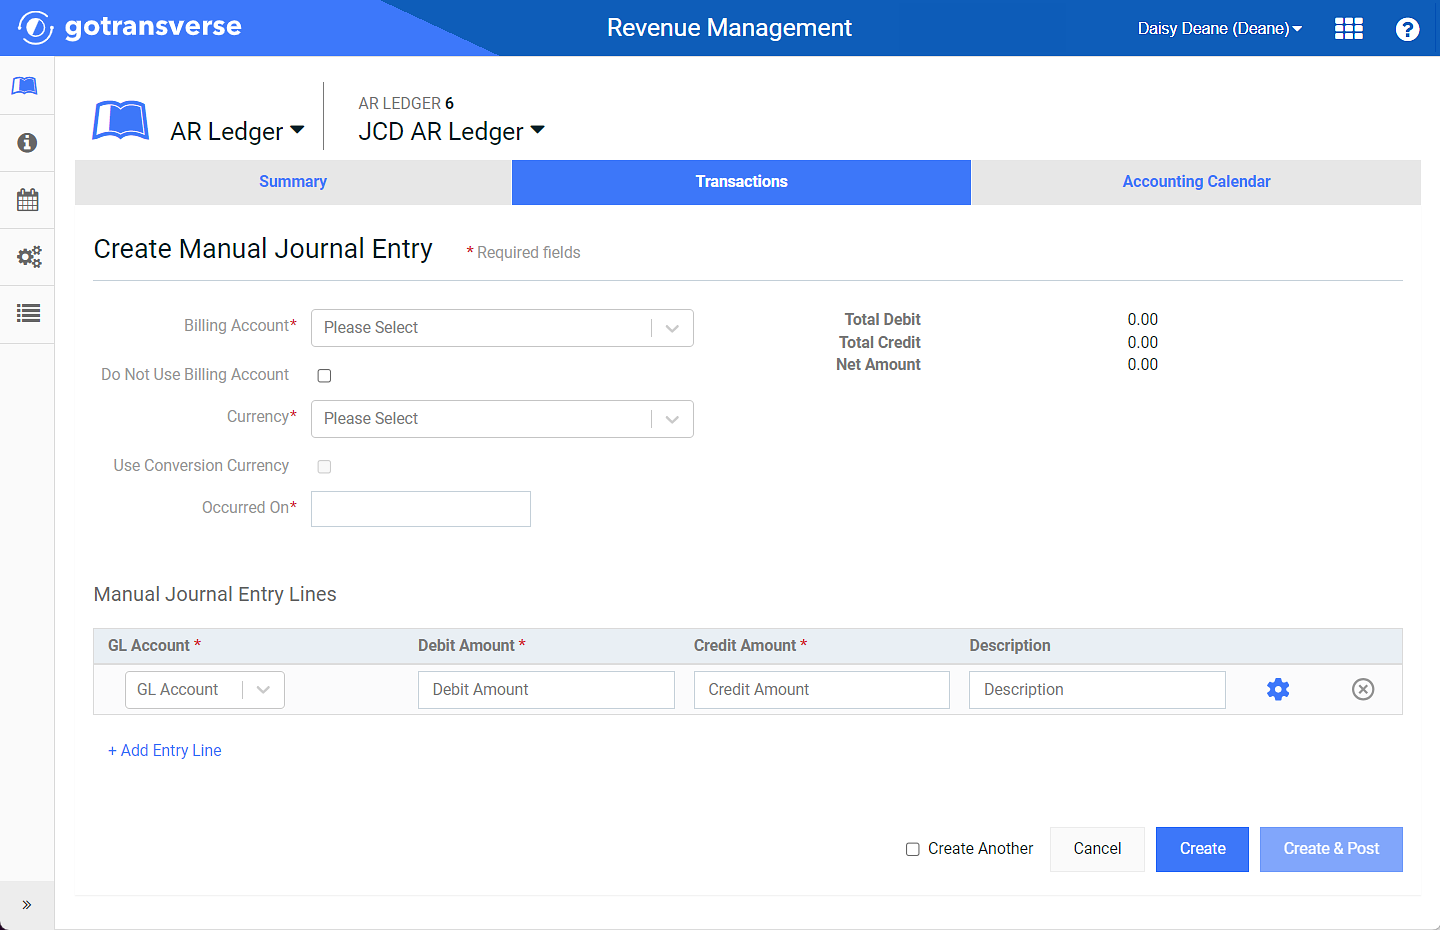
Create Manual Journal Entry Window
Required fields are marked with an asterisk.
-
Billing Account* — Select the billing account related to the journal entry.
If no billing account is required, leave this field blank and select Do Not Use Billing Account in the next field.
-
Do Not Use Billing Account — Select the checkbox if no billing account will be required to create the transaction. You would use this option if you are creating a transaction without a specific billing account, such as an AR reserve or a consolidated adjustment for many billing accounts.
Clear the checkbox if a billing account is required to create the transaction.
-
Currency* — Select the currency code for the transaction. If a billing account is selected, then the currency will be populated for you.
-
Use Conversion Currency — Select the checkbox if the transaction will be posted in the ledger’s converted currency. This option is only available if conversion currency is turned on for the ledger and if the journal entry is not posted for a billing account.
Clear the checkbox if no currency conversion is necessary.
-
Occurred On* —Enter the date that reflects the date on which the financial activity occurred. This does not impact the posting date which will be determined by the accounting period.
-
-
Add as many manual journal entry lines (lines) as needed by clicking + Add Entry Line. You will need at least two lines.
Entry lines must have a GL account and an amount to debit or to credit. A line cannot have both a debit and credit amount; one field must be left blank. The sum of debits less the sum of credits must total zero.
The balance of the manual journal entry is displayed in the upper right corner showing total debits, total credits, and net amount. The journal entry cannot be created or posted until the net amount total is zero. Lines can be removed by clicking the
 icon to the right of each entry line.
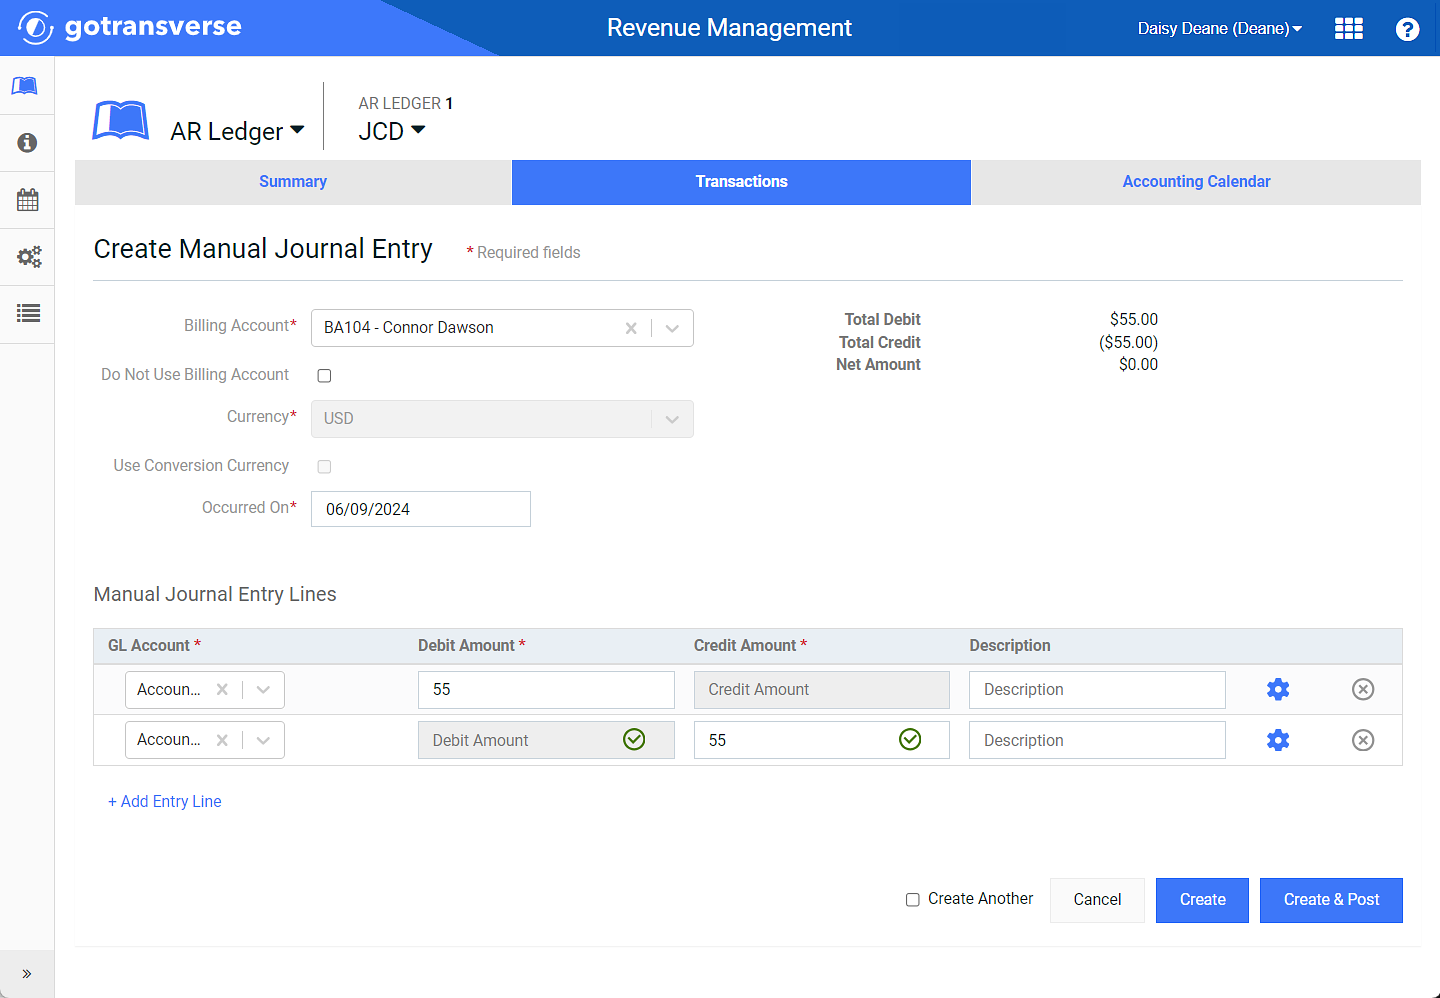
Create Manual Journal Entry - Balance Totals
-
After all required fields are entered, and the Net Amount totals zero, complete one of the following:
-
Select the Create Another checkbox to create this entry as a draft and create another entry.
-
Click Create to save the entry as a draft entry. The draft entry will not create transactions until it is posted.
The draft entry displays under the Draft Entries detail tab. Refer to Edit, Post, or Delete Draft Entries for more information on working with these entries.
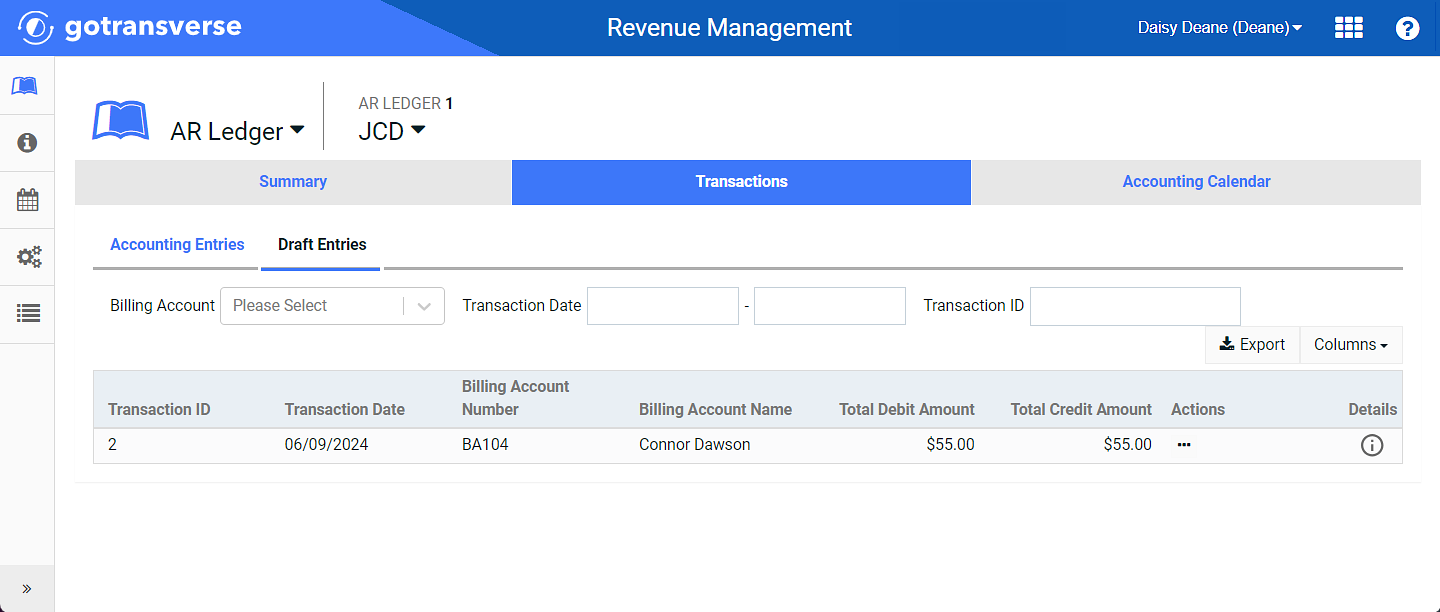
AR Ledger Transactions Tab - Draft Entries Detail Tab
-
Click Create & Post to save and immediately post the entry. The entry will display on the Transactions tab under the Accounting Entries detail tab (after a required filter has been applied). Refer to Filter, Configure, or Export Transaction Entries for more information on applying required filters to the Transaction window.
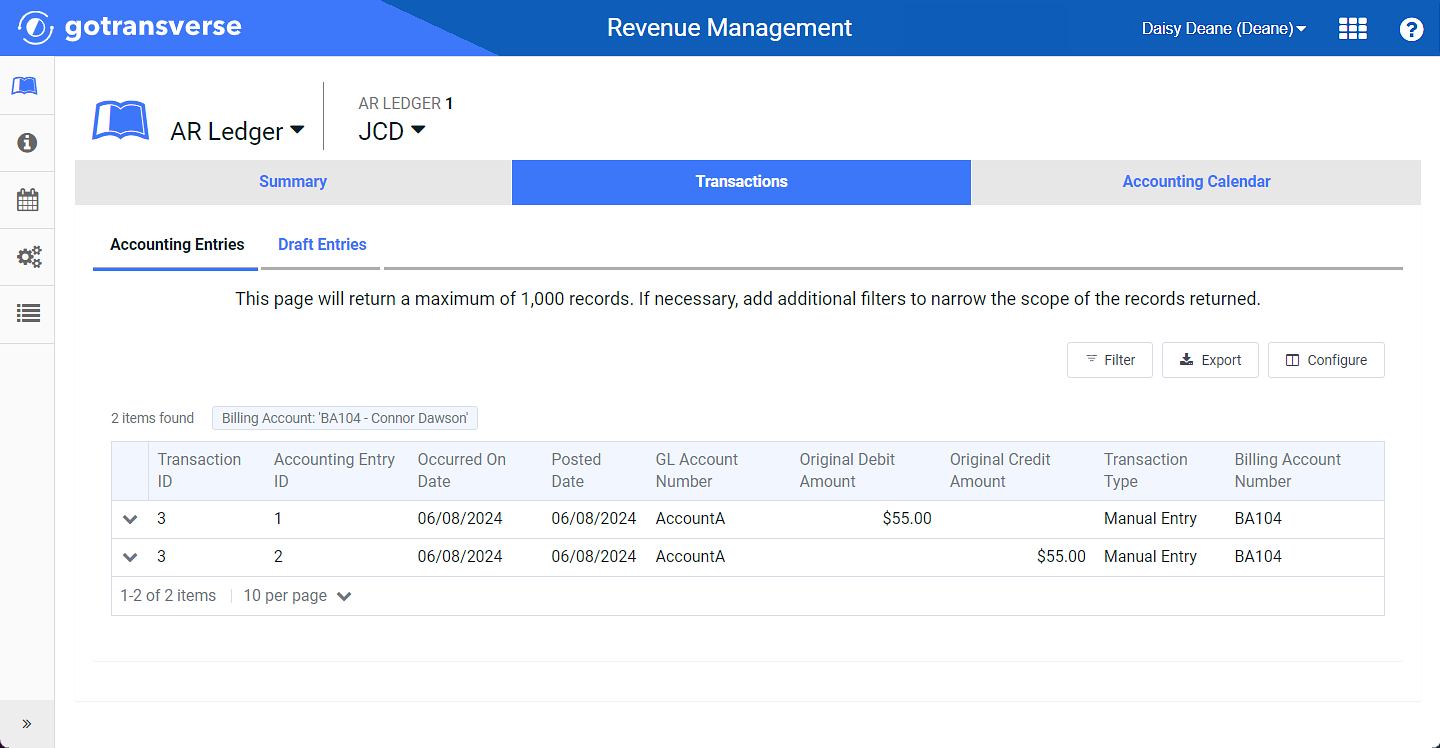
New Entry Added to Transactions Window
-