You must first select a Billing Account Number
Complete the following steps to filter, configure table contents, and export accounting entries (transactions) for an AR Ledger:
Draft entries are found under the Draft Entries detail tab and will not display in the search results on the Accounting Entries detail tab. Refer to Edit, Post, or Delete Draft Entries for more information.
-
Select Revenue Management from the Gotransverse application menu
 .
. -
Click AR Ledger in the left pane.
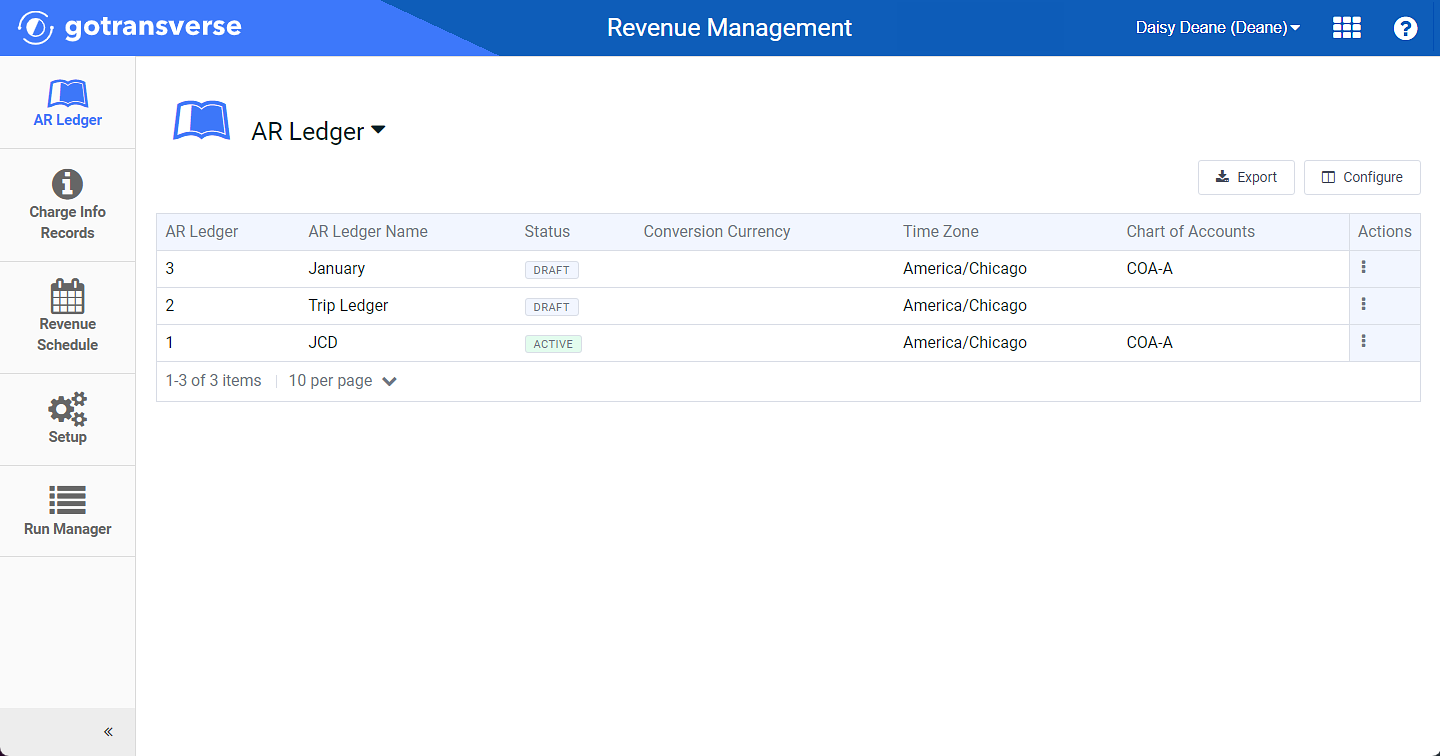
AR Ledger Window
Click the
 icon in the left pane to hide it. Click the
  icon to open it.
You can manage which columns display in any table with a Configure or Columns button by clicking the button and selecting desired columns. In addition. If the table includes a Filter button, you can filter the table contents. If the table includes an Export button, you can export visible table contents (up to 50) to a CSV (comma-separated values) file. Refer to Data Tables for more information about using these features.
-
Select an AR Ledger from the list to open the AR Ledger Details window.
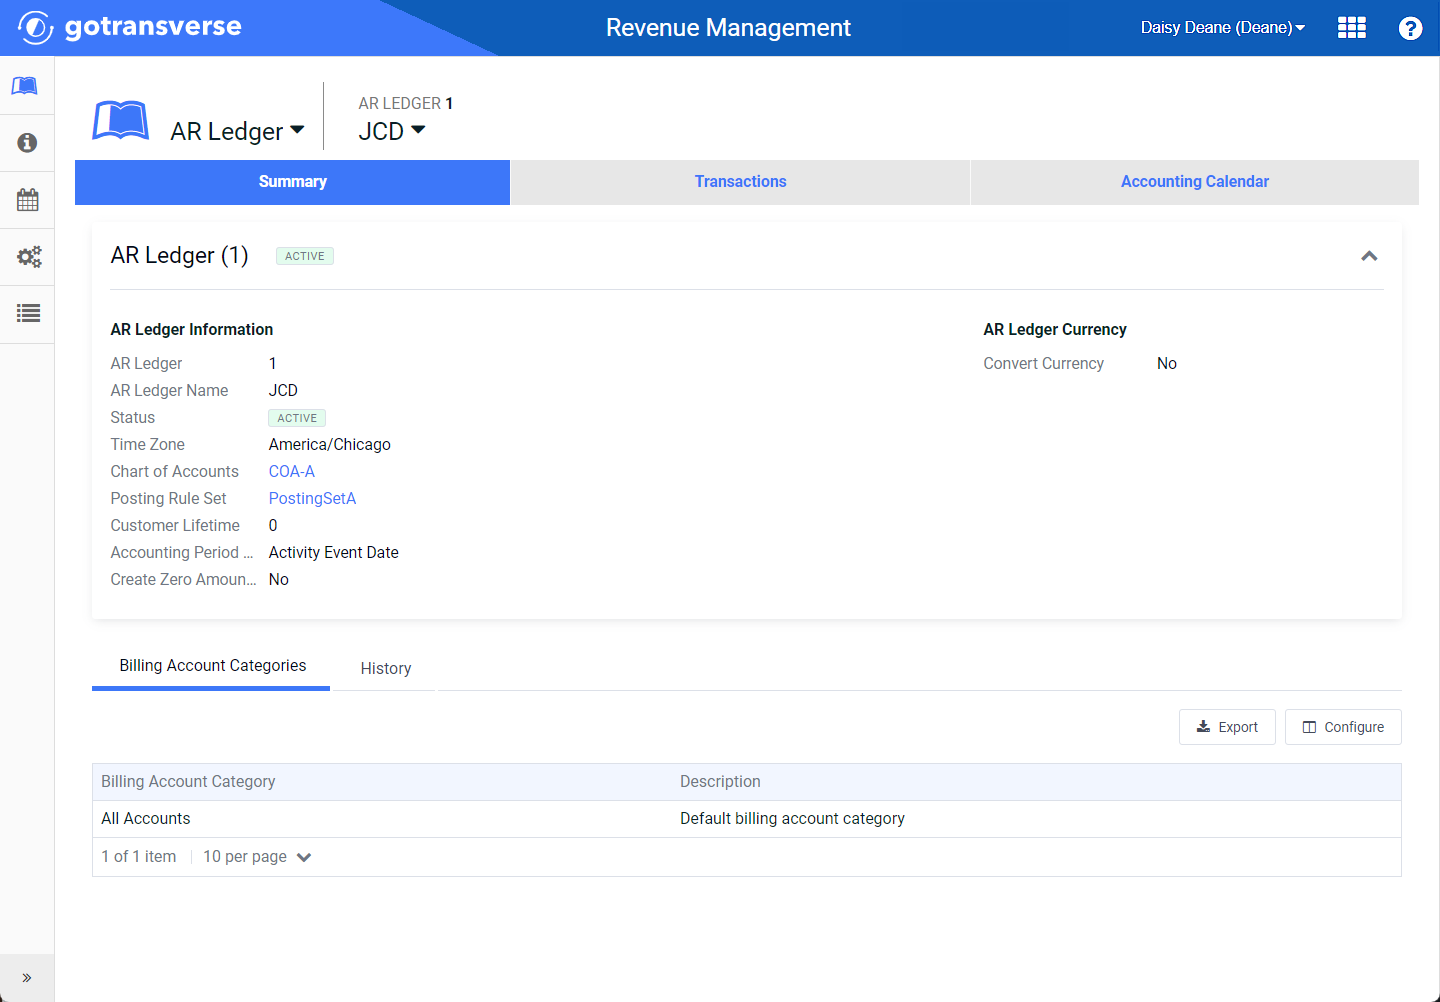
AR Ledger Details Window
-
Click the Transactions tab.
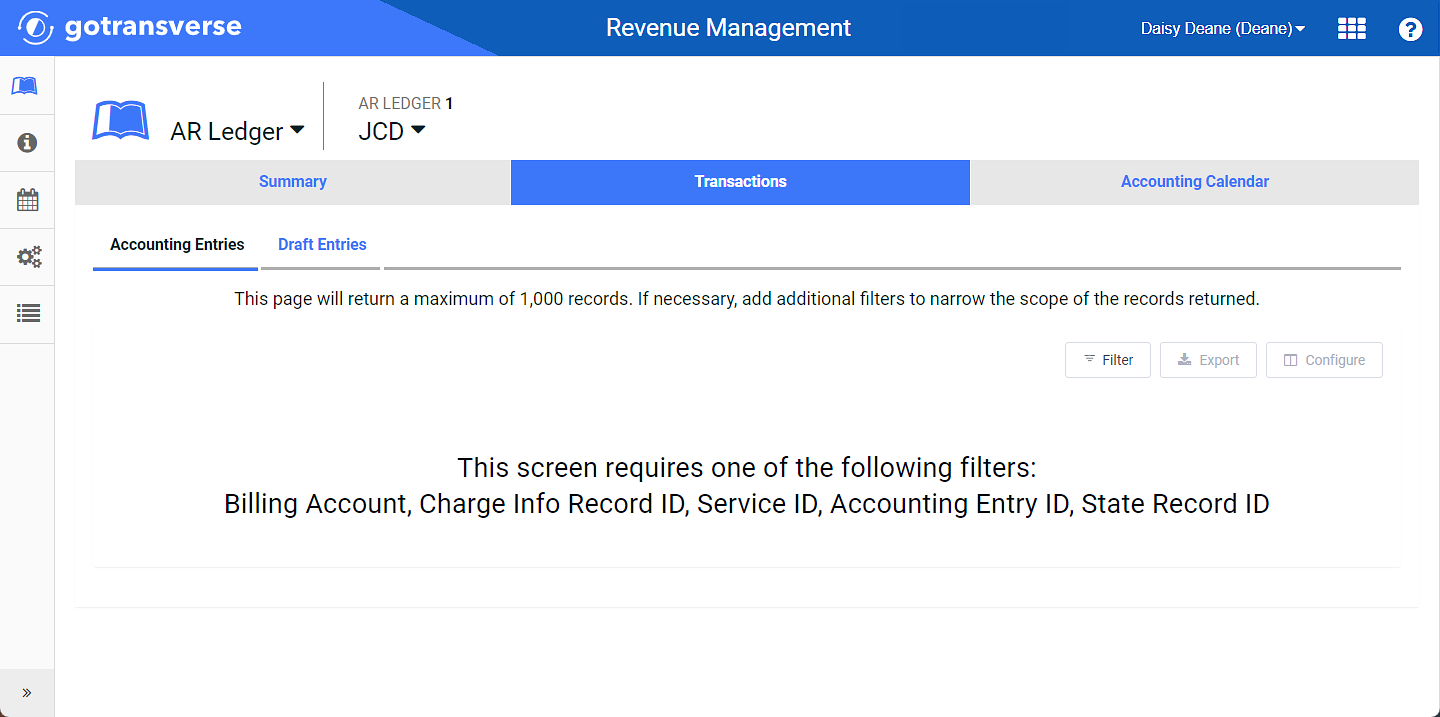
Transactions Tab
-
Click the Filter button to open the Accounting Entry filter slide-out window.
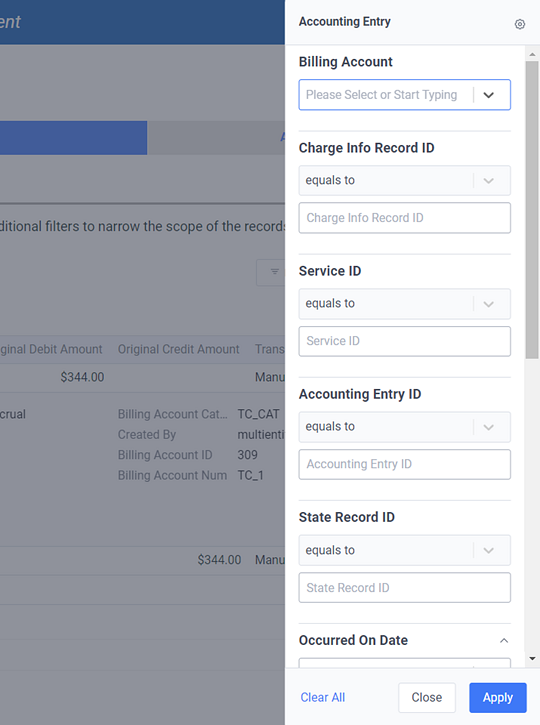
Accounting Entry Filter Slide-Out Window
-
To configure filter options, click the
 icon to open a filter drop-down menu. Select options to display in the slide-out window, or click Restore Defaults to use only default options. Click outside the menu to close it.
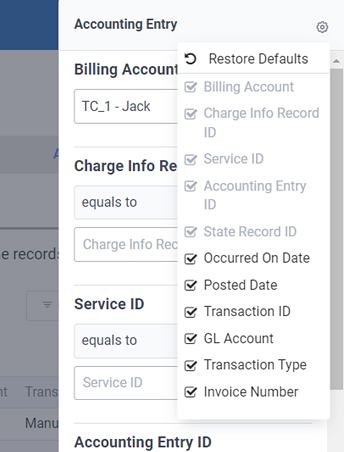
Filter Options Menu
-
-
On the Accounting Entry filter slide-out window, select options for one or more of the required categories. The Billing Account drop-down also includes a None option. You can select other filters, but at least one of the required filters must be selected.
To filter the drop-down list or to find a specific item, enter letters or numbers that are part of the name in the field. The list will update with any matching items that contain the letters or numbers you entered.
-
If needed, click Clear All to clear selections.
-
Click Apply to apply filters and close the slide-out window.
If you remove values from required filters but leave any non-required filters set with a value, an error message displays. Enter a value in one of the required filters’ field to continue.
The Transactions window displays all records for the applied filters. Applied filter options display above the table.
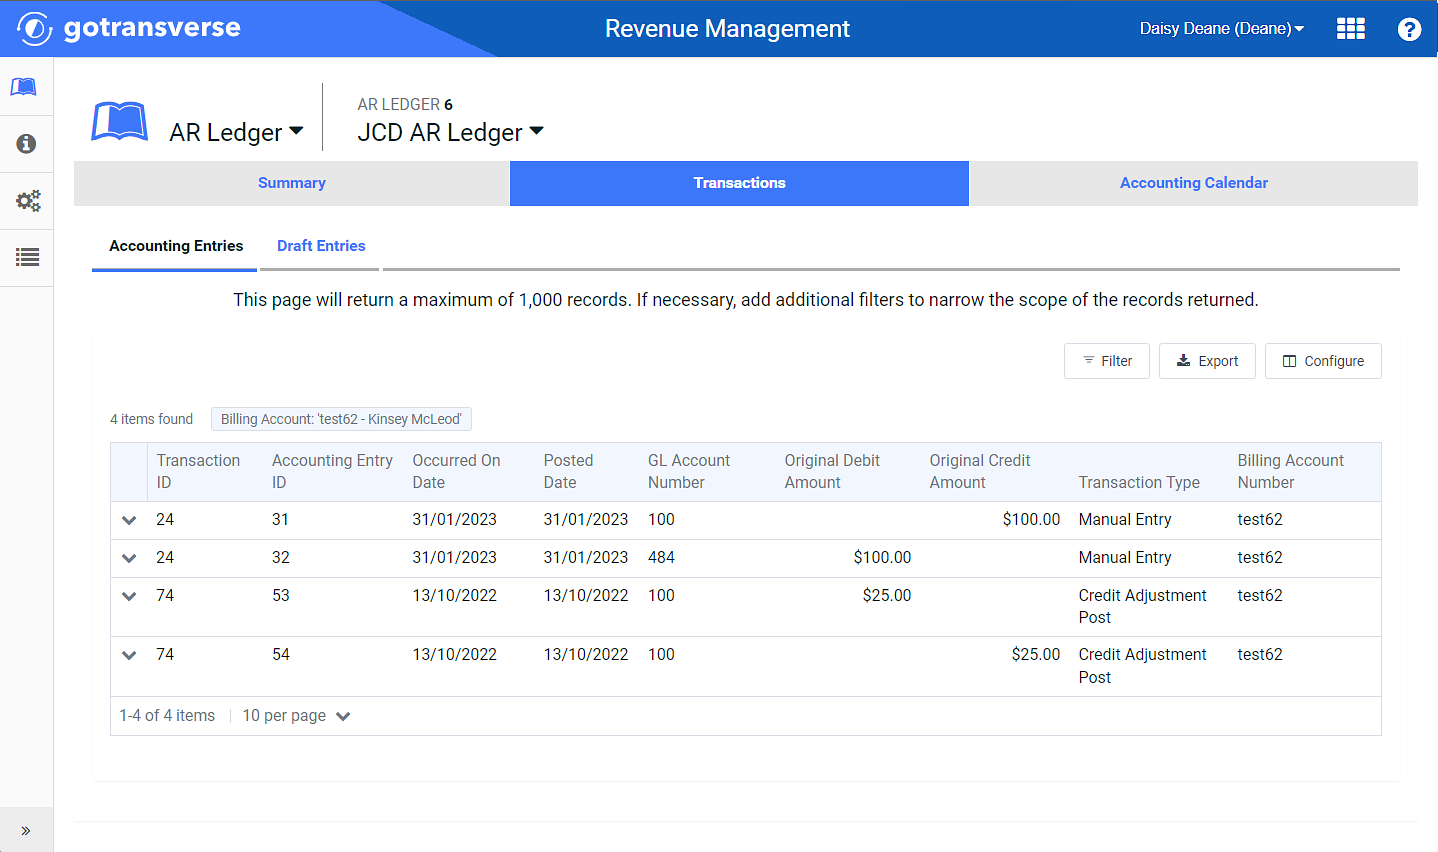
Transactions Filtered
-
To view additional information for any record, click the
 icon to expand. Use the scroll bar in the expanded pane to view more details. Click the
  icon to collapse the pane.
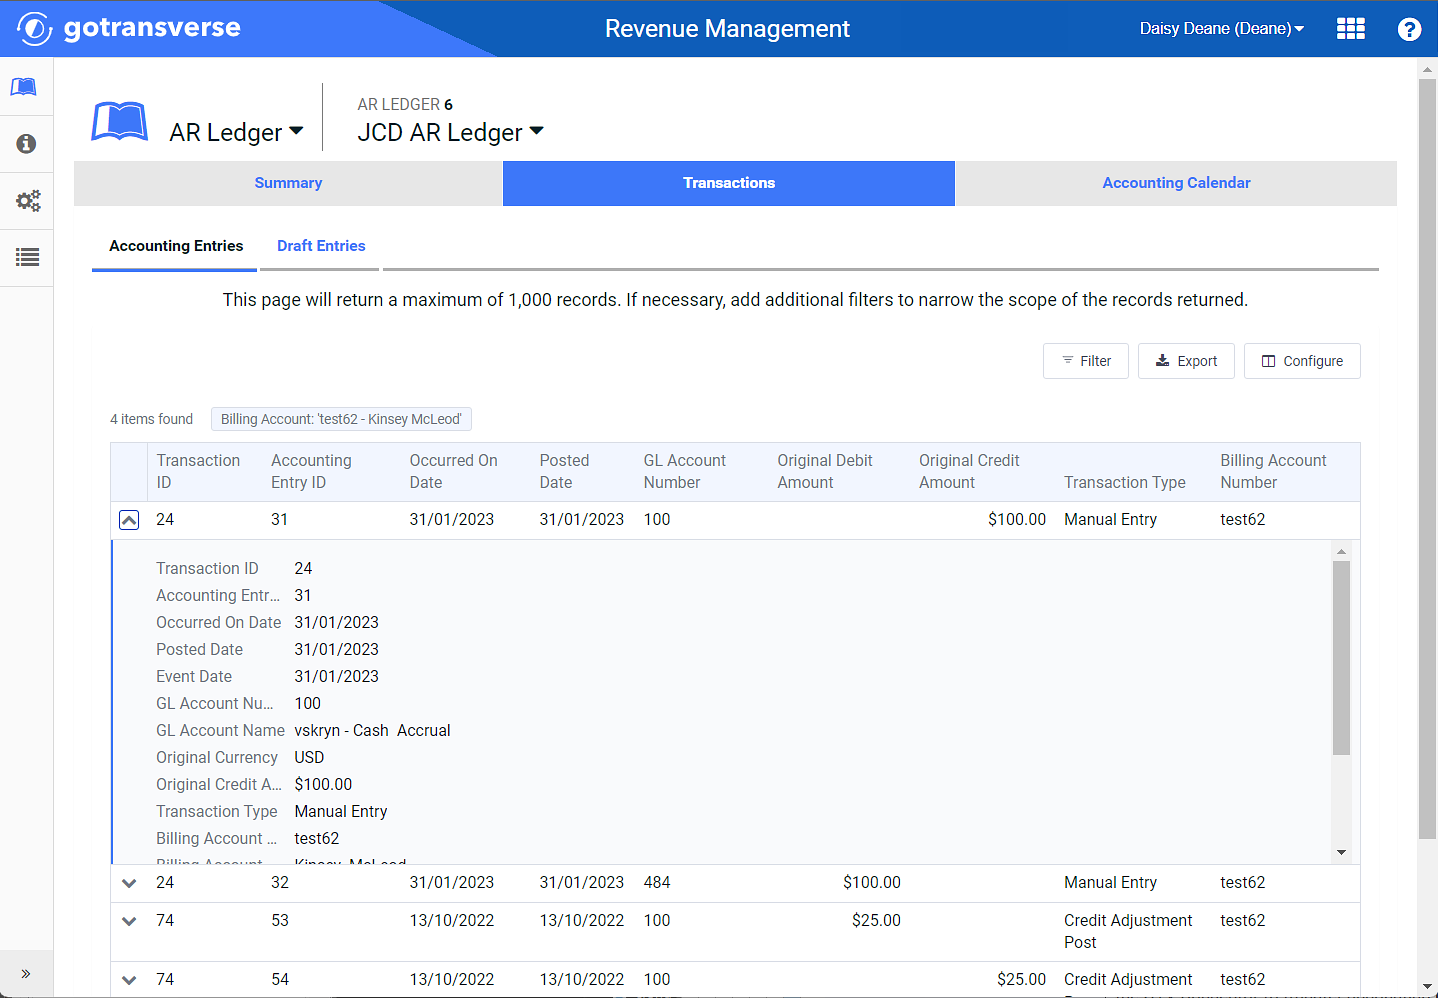
Expanded Accounting Entry
-
To remove any non-required filter, click the X in the filter name or click Clear Non-Required Filters. You can clear all but one required filter. To change a required filter, click the Filter button and select another option.
-
To configure which columns display in the table, click the Configure button and select column names. Use the scroll bar to see more column names. Click outside the menu to close it.
Refer to Data Tables for more information on how to sort, configure, reorder, and export data table contents.
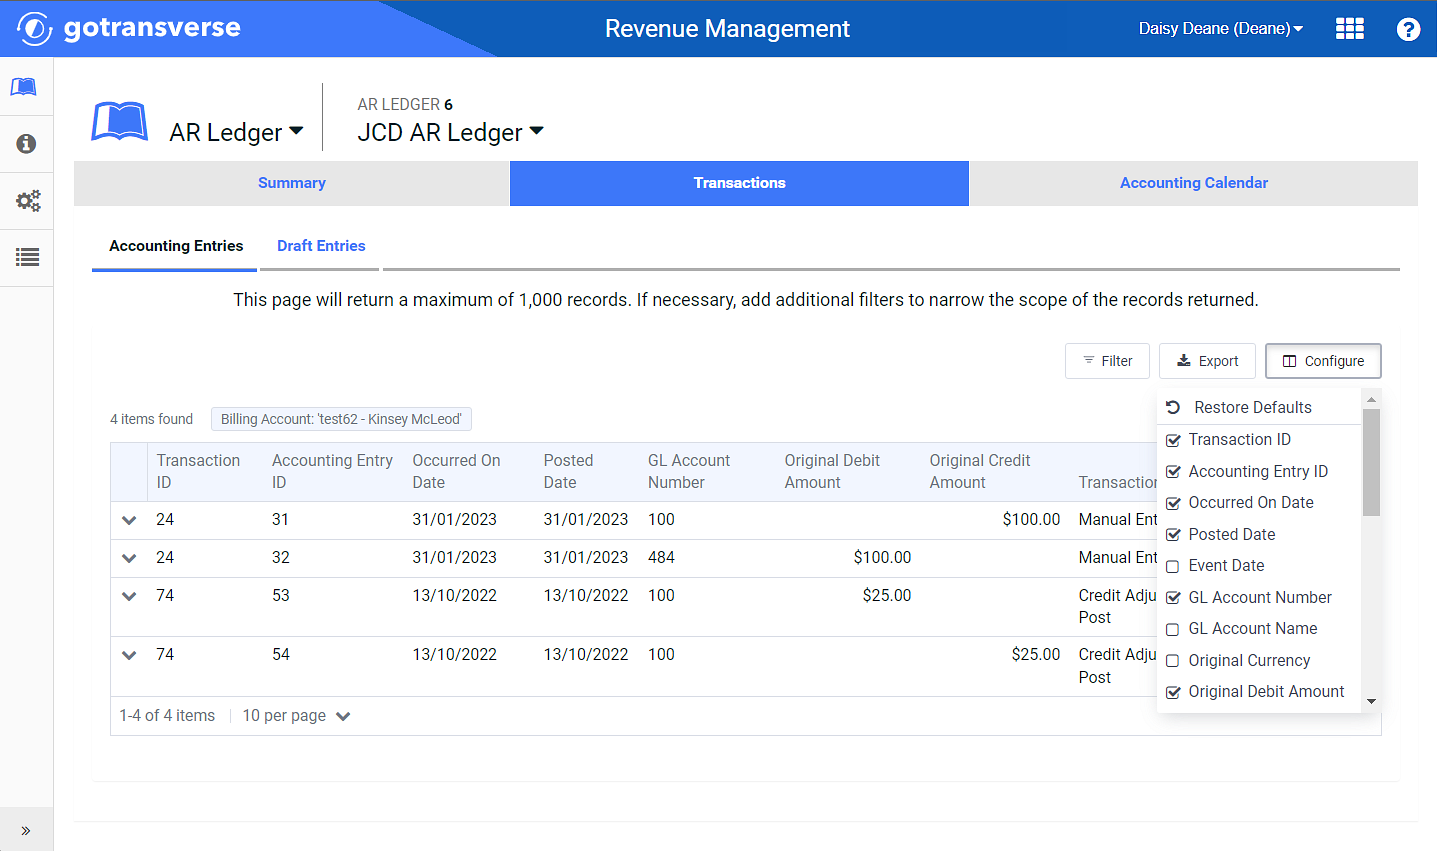
Configure Columns
To return to default settings, click Restore Defaults.
Options include:
-
Transaction ID — The Transaction ID on the accounting entry.
-
Accounting Entry ID — The unique ID of the accounting entry.
-
Occurred On Date — The date representing the financial activity for the entry.
-
Posted Date — The date representing the accounting period logic defined on the related ledger.
-
Event Date — The date that the activity in Gotransverse Billing was entered. This is not the Occurred On Date.
-
GL Account Number — The GL account number for the accounting entry.
-
GL Account Name — The GL account name for the accounting entry.
-
Original Currency — The currency of the billing account associated with the entry.
-
Original Debit Amount —The debit amount in the original currency.
-
Original Credit Amount — The credit amount in the original currency.
-
Converted Currency — The currency of the AR Ledger.
-
Converted Debit Amount — The debit amount in the converted currency.
-
Converted Credit Amount — The credit amount in the converted currency.
-
Entry Description — Description of the entry from the Posting Rule or that was entered by the creator of a manual journal entry.
-
Transaction Type — The Charge Info type of the accounting entry.
-
Billing Account Number — The number of the billing account associated with the accounting entry.
-
Billing Account Name — The name of the billing account associated with the accounting entry.
-
Billing Account Category —The category of the billing account associated with the accounting entry.
-
Charge Category — The associated charge category, if any. The only transaction type that does not have a charge category is Manual Entry.
-
Charge Info Record ID — The Charge Info (CIR) ID associated with the accounting entry.
-
State Record ID — The State Record ID associated with the accounting entry.
-
Invoice Number — The invoice number associated with the accounting entry.
-
Service ID — The Service ID associated with the accounting entry.
-
GL Posting Rule ID — The GL Posting Rule ID that was used to create the accounting entry.
-
GL Posting Rule Name —The GL Posting Rule name for the posting rule noted in GL Posting Rule ID.
-
Created By — User name of the user who created the entry.
-
-
To export the table contents in the current view (maximum of 50 records) in CSV format, click Export. The file is downloaded to your computer.
Only the records shown in the current view (maximum of 50 records) are exported. To export more or all records, change the number of records shown per page or export each page.