Add or Edit Email Operations for Billing Actions
Billing email operations are managed in the Setup application’s Notification Management Module. Refer to Configure Email Operation for Invoice Notifications for more information about invoice notifications.
Bill Batch notifications include the following type:
Complete the following steps to add or edit email operations for billing actions:
-
Select Rating & Billing from the Gotransverse application menu
 .
.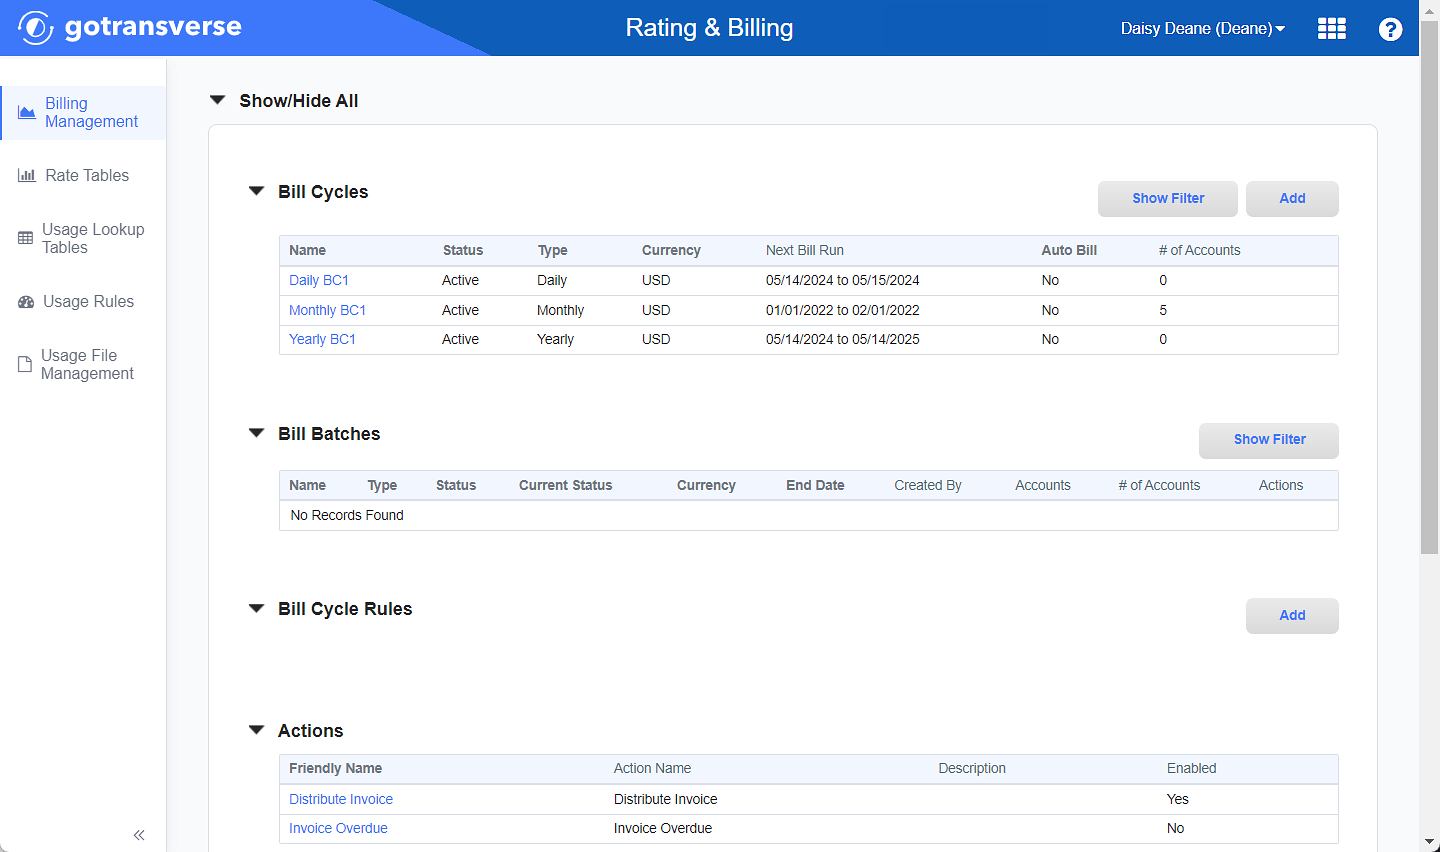
Billing Management Window
Click the
 icon in the left pane to hide it. Click the
  icon to open it.
 -
In the Actions section, click the Friendly Name active link of the action you wish to configure to open the Action Configuration window.

Actions Section
-
On the Action Configuration window, in the Email Operations section, click the Add button to add a new email operations, or click Edit in the Actions column for an operation to edit the operation. Both actions will open the Configure Email window.
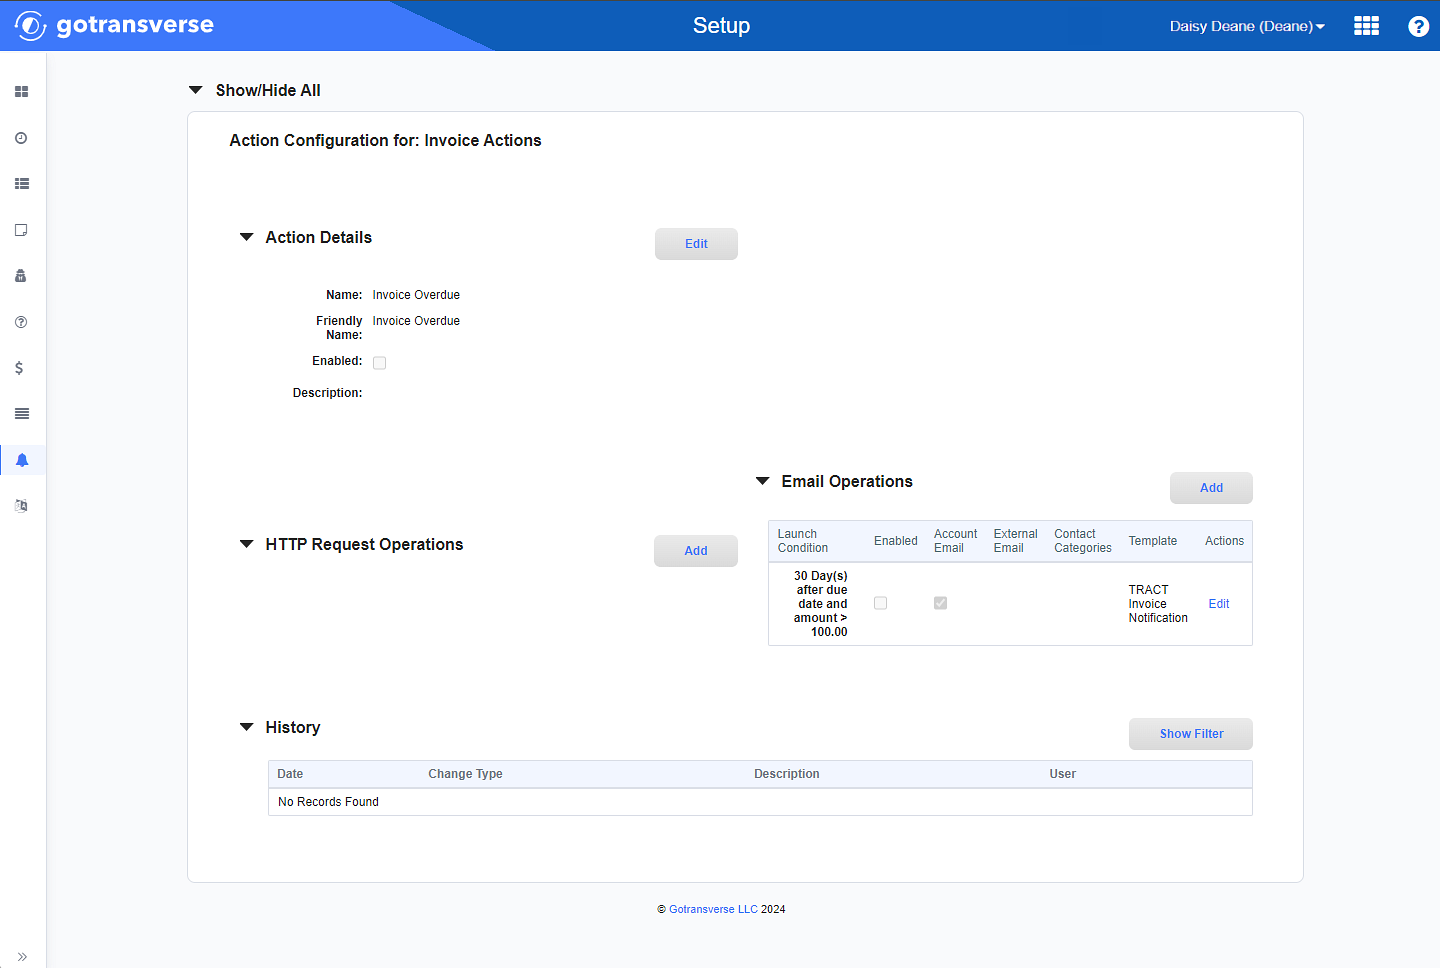
Action Configuration Window
-
On the Configure Email window, enter or edit the required and relevant information based on the type of notification you selected:
The configuration window for the different notification types are shown below.
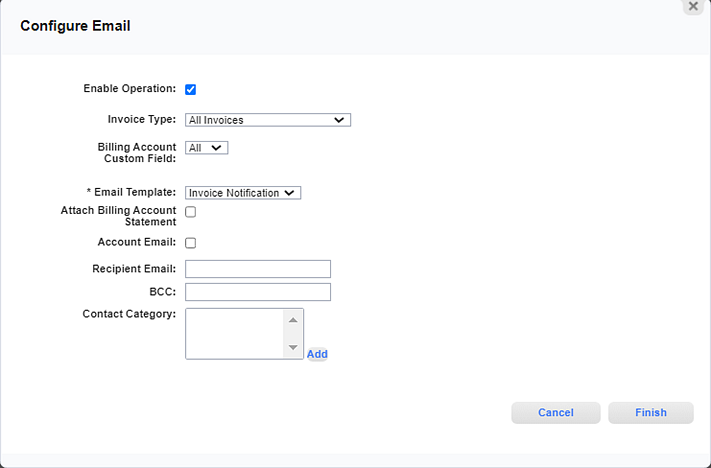
Configure Email Window For Distribute Invoice Notification
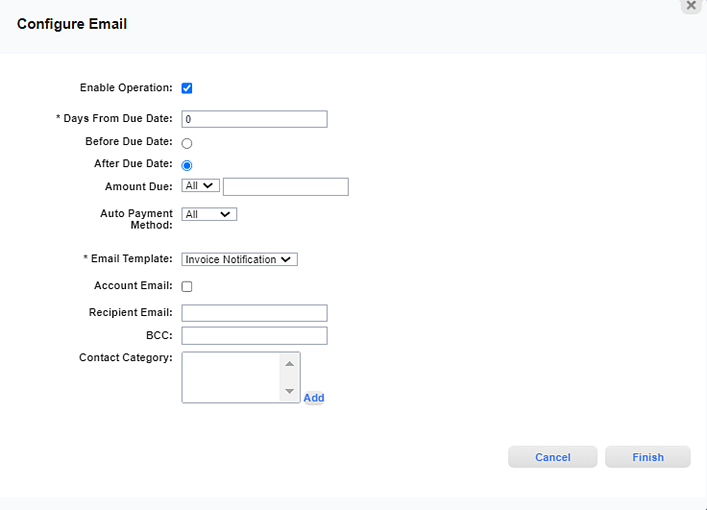
Configure Email Window For Invoice Overdue Notification
Required fields are marked with an asterisk.
-
Enable Operation checkbox — Indicates whether the operation is on and available for use. Select or deselect the checkbox to enable or disable this action as follows:
-
Selected: The request will occur.
-
Not selected: The request will not occur. This request can be enabled later. Any request operation can be enabled at any time after they are created.
-
-
Invoice Type — (for Distribute Invoice type only.) You can configure the email operation to send an email under the following conditions:
-
All Invoices: When an invoice of any type is created.
-
Standard Invoices Only: When a standard (non-manual) invoice is created.
-
Manual Invoices Only: When a manual invoice is created. When this option is selected, the Manual Invoice Reason options display.

Manual Invoices Only Options
-
-
Manual Invoice Reason — (for Distribute Invoice type only.) When Manual Invoices Only is selected for Invoice Type. Select either Inclusive or Exclusive radio button. Then select a Reason from the drop-down list. Reasons are created and managed in the Setup application. Refer to Reasons Module for more information.
-
Inclusive: Includes only invoices with the selected Manual Invoice Reasons for the email operation.
-
Exclusive: Excludes invoices with the selected Manual Invoice Reasons from the email operation.
-
-
Billing Account Custom Field — (for Distribute Invoice type only.) Select from the list of enabled Account Custom Fields. The list also includes the option All to select all enabled Account Custom Fields.
-
Billing Account Custom Field Value — (for Distribute Invoice type only.) For text custom field types, enter a value that will trigger the notification. For list custom field types, select from a list of options, including All, to trigger the notification.
If the option All was selected in the Billing Account Custom Field field, this field does not display.
-
Email Template* — Select the email template that was configured for this type of notificationsfrom the drop-down list. Gotransverse provides you with a Default Invoice email template. Refer to Add Notification Template for more information on how to add and configure a notification template.
-
Attach Billing Account Statement checkbox — (for Distribute Invoice type only.) You have the option to attach a statement to the email. When you select this option, the Attachment Template drop-down list displays so that you can select the statement template that you want to attach to the email.
-
Attachment Template — (for Distribute Invoice type only.) When Attach Billing Account Statement checkbox is selected. Select the statement template from the drop-down lists that you want to attach to the email.
-
Days From Due Date* — (for Invoice Overdue type only.) Defines the number of days before or after a customer's payment is due to be paid.
-
Before Due Date radio button— (for Invoice Overdue type only.) Indicates that the action occurs the specified number of days before the due date.
-
After Due Date radio button — (for Invoice Overdue type only.) Indicates that the action occurs the specified number of days beyond the due date.
- Amount Due — (for Invoice Overdue type only.) Includes a selector and text field. Select one of the selectors in the drop-down list and then enter a value for amount due in the text field. If you select All, you do not need to enter an amount in the text field.
- Auto Payment Method — (for Invoice Overdue type only.) Select an auto-payment method from the drop-down list.
-
Account Category — For multi-entity tenants only. Select the account category from the drop-down list.
-
Account Email checkbox — Specifies whether to use the email address from the billing account's customer. Select or deselect the checkbox to enable or disable this action as follows:
-
Selected: Use the email address of the billing account's customer.
-
Not selected: Do not use the email address of the billing account's customer. Enter an address in the Recipient Email field (below).
-
-
Recipient Email — If you selected to not to use the account email address, enter the alternate customer email address to which to the notification will be sent.
-
BCC — Enter an email address that will receive a copy of this email.
-
Contact Category — Select from the available categories or add a new category by clicking Add. Enter information as needed and click Finish to close the Add Contact Category window.
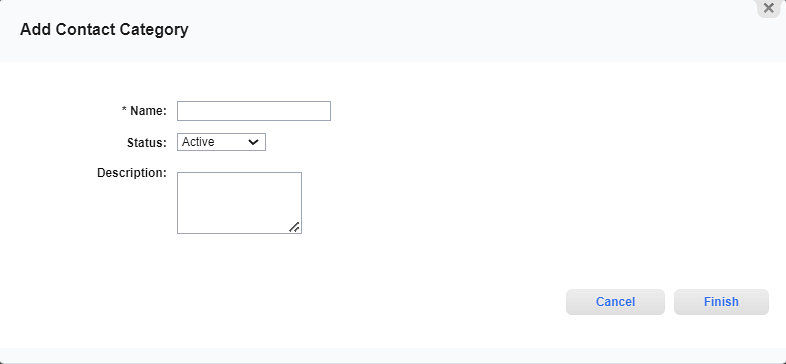
Add Contact Category Window
Contact Categories are managed in the Setup application’s Categories Module. Refer to Add Contact Category for more information about adding new contact categories.
-
-
Click Finish to save your operation. The email operation is added (or updated) in the Email Operations section of the Action Configuration window.
Topic updated: 04/2024.