Create a Schedule
Schedules allow running integrations or extracts at a given interval. When creating a schedule, you will need to specify either an Extract or an Integration and Configuration combination, as well as a run interval (cron). If desired, you can add email addresses to be used to send notifications when a scheduled run is created or when the run transitions to an inactive state.
Scheduled runs have empty Data Filters and do not have Run Properties.
You can create an on demand run for an integration in the Integrations module. Refer to Create Integration Run for more information. You can also create an extract run in the Extracts module. Refer to Create Extract Run for more information.
Run Details windows can also be accessed from either the Integrations or Extracts window by selecting the integration or extract, respectively, and then selecting the run listed under the Runs detail tab.
Complete the following steps to create a schedule:
-
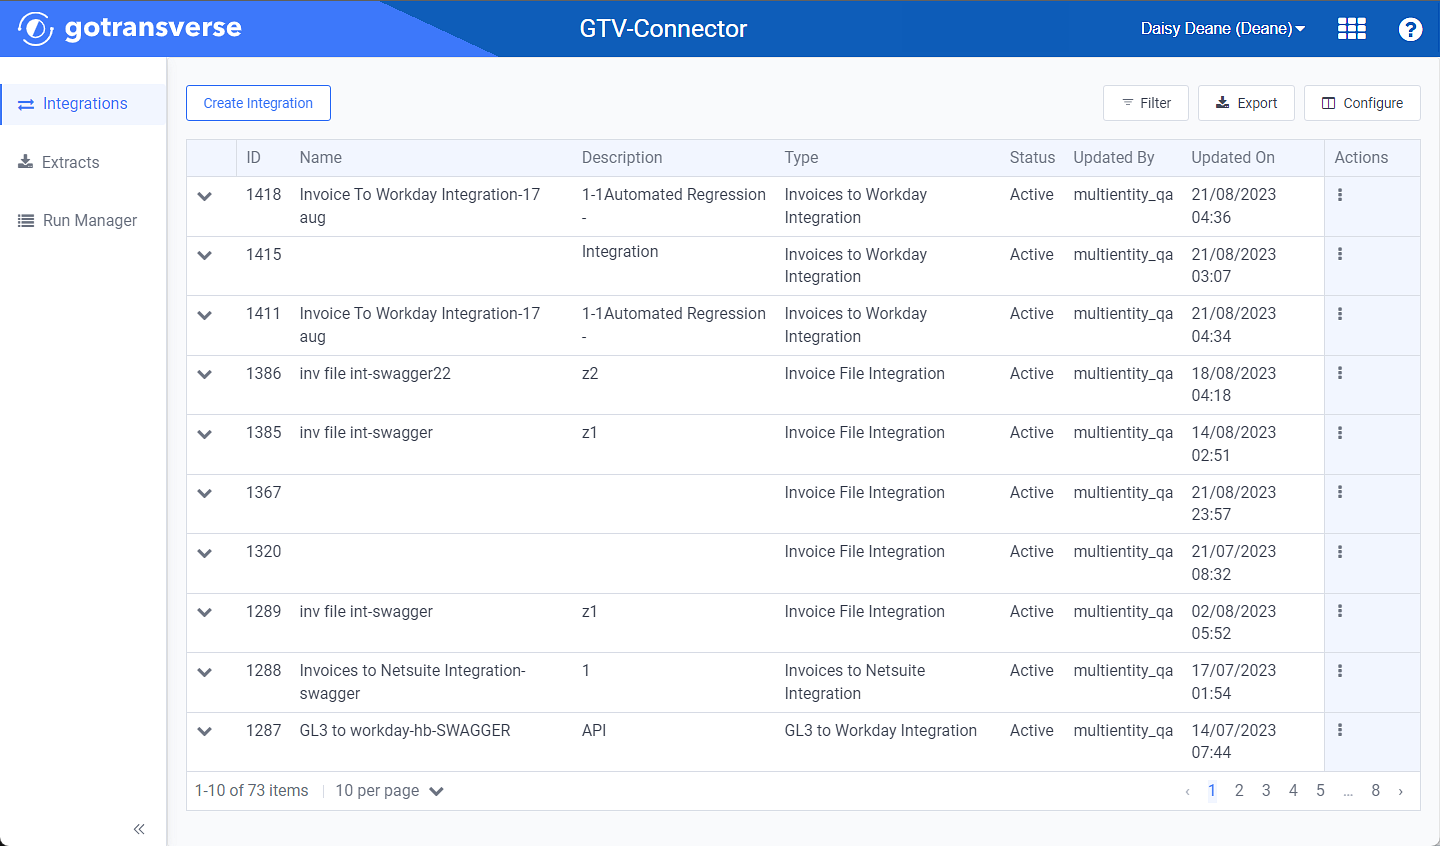
Select GTV-Connector from the Gotransverse application menu
 .
.
Integrations Window
Click the
 icon in the left pane to hide it. Click the
  icon to open it.
You can manage which columns display in any table with a Configure or Columns button by clicking the button and selecting desired columns. In addition. If the table includes a Filter button, you can filter the table contents. If the table includes an Export button, you can export visible table contents (up to 50) to a CSV (comma-separated values) file. Refer to Data Tables for more information about using these features.
-
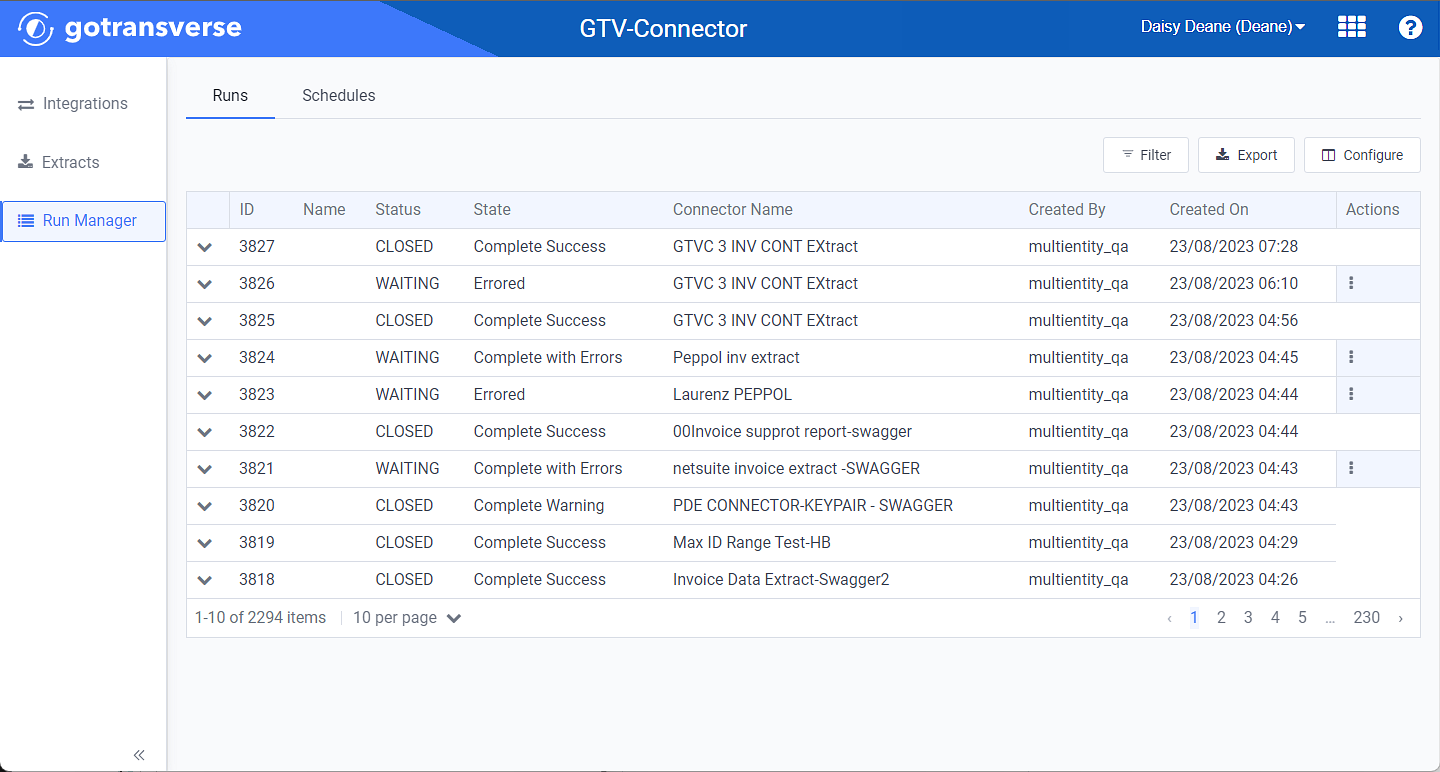
Click Run Manager in the left pane.

Run Manager Window
-
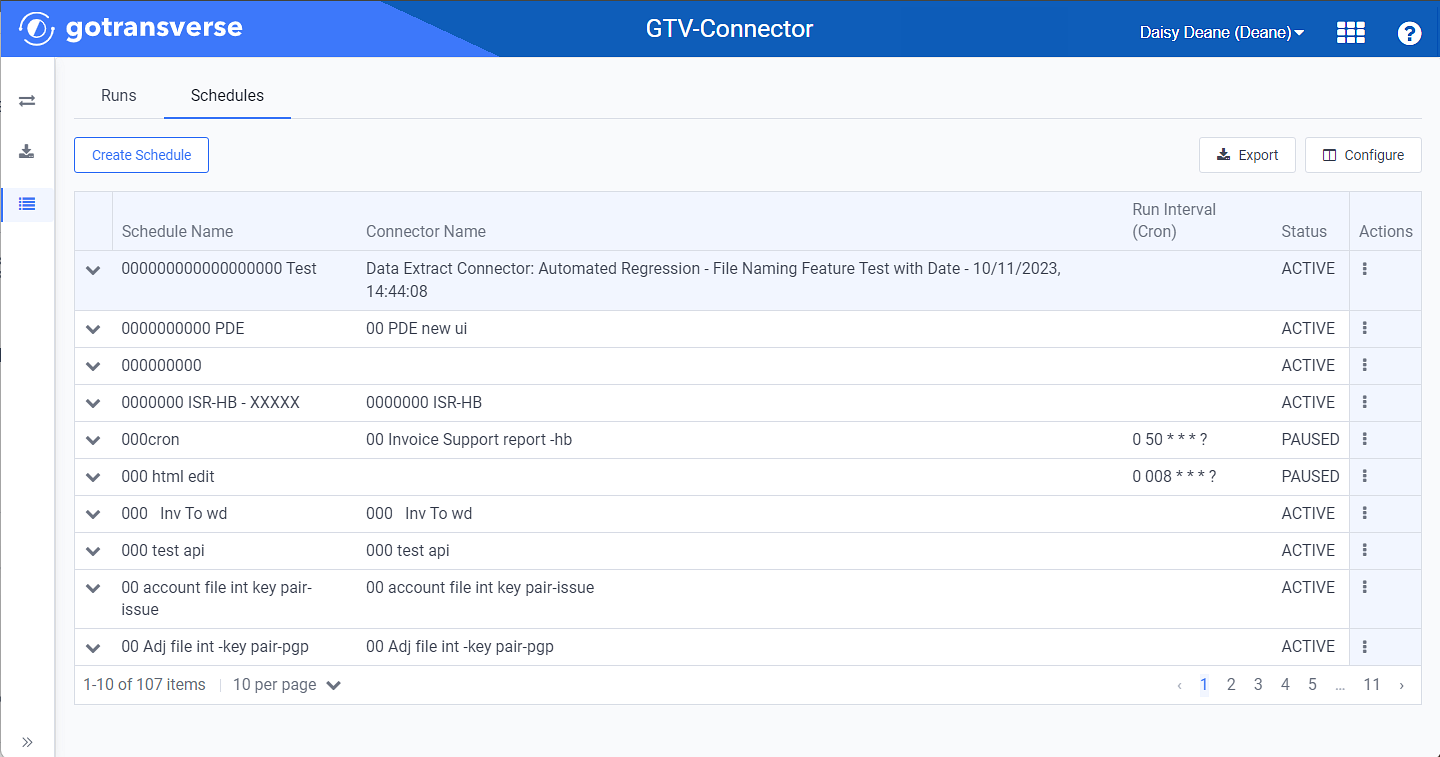
Click the Schedules tab.

Run Manager Schedules Tab
-
Click the Create Schedule button to open the Create Schedule window.
-
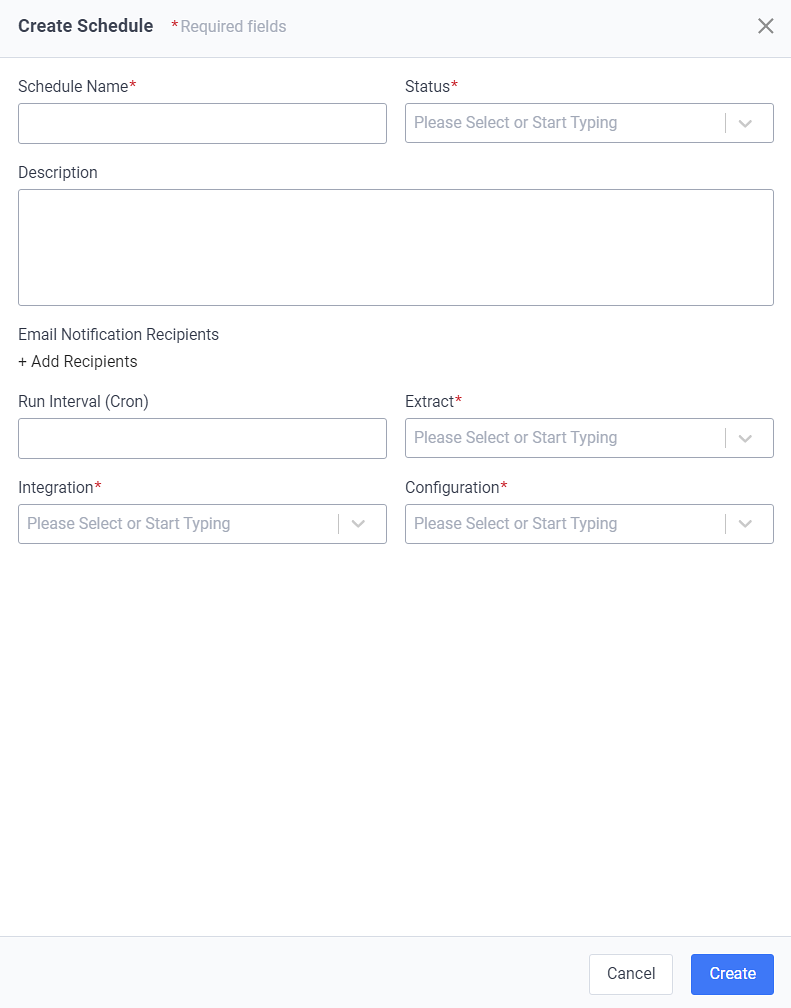
On the Create Schedule window, complete the required and relevant information:

Create Schedule Window
Required fields are marked with an asterisk.
-
Schedule Name* — Enter a name for the schedule.
-
Status* — Select a status for the schedule:
-
Active: Schedule will run.
-
Paused: Schedule will not run.
-
-
Description — Enter a description of the schedule.
-
Email Notification Recipients — Add email addresses for people you would like to receive an email notification about this schedule.
-
Click +Add Recipients to display an email field.
-
Enter an email address.
-
Click +Add Recipients to add additional email addresses.
-
Click the
 icon to delete any address.
-
-
Run Interval (Cron) — Enter a run interval using the Quartz Cron format for the schedule. For example, 0 11 11 11 11 ? is equal to an interval of every November 11th at 11:11 AM or 0 15 10 ? * * is equal to an interval of every day at 10:15 AM. Refer to Cron Format Information
 for more information about using this cron format and other examples.
 -
Extract* — Select an extract from the drop-down list. If you select an extract, both the Integration and Configuration fields will be grayed out.
-
Integration* — Select an integration from the drop-down list. If you select an integration, you must also select a configuration.
-
Configuration* — If you select an integration, the options for a configuration are based on that integration. Select a configuration from the drop-down list. If you select a configuration, you must also select an integration.
-
-
Click Create.
Topic updated: 02/2024.