Avalara Tax Processor Integration
This tax processor does not support tax calculations for Manual Charges. An error will occur and prevent a user from creating a manual charge with the Submit for Taxation checkbox selected.
Refer to the following information before configuring the tax processor:
-
Ensure that you have an Avalara account.
-
Log in to avalara.com
 and obtain your account information to configure the Gotransverse tax processor.
 -
Create at least one tax charge category. Refer to Add Charge Category for more information.
Complete the following steps to configure an Avalara Tax integration:
-
Select Admin from the Gotransverse application menu
 .
. -
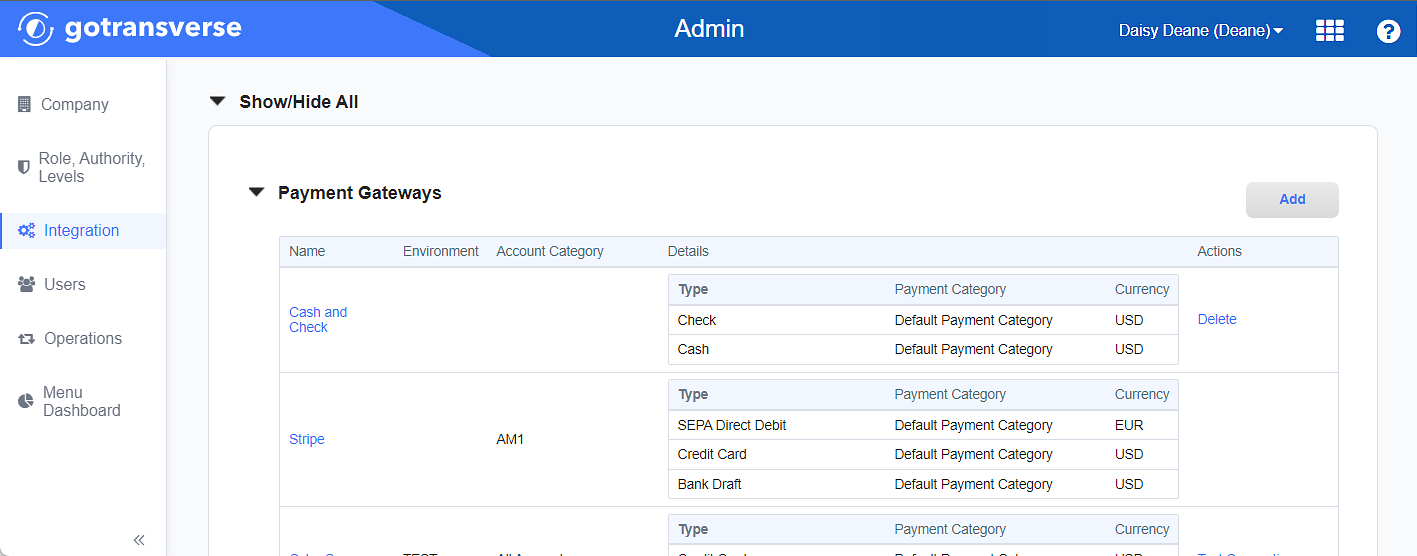
Click Integration in the left pane.

Payment Gateways Section
Click the
 icon in the left pane to hide it. Click the
  icon to open it.
 -
In the Payment Gateways section, click the Add button to open the Add Payment Gateway window.
-
Click the Add button to open the Add Tax Processor window.
-
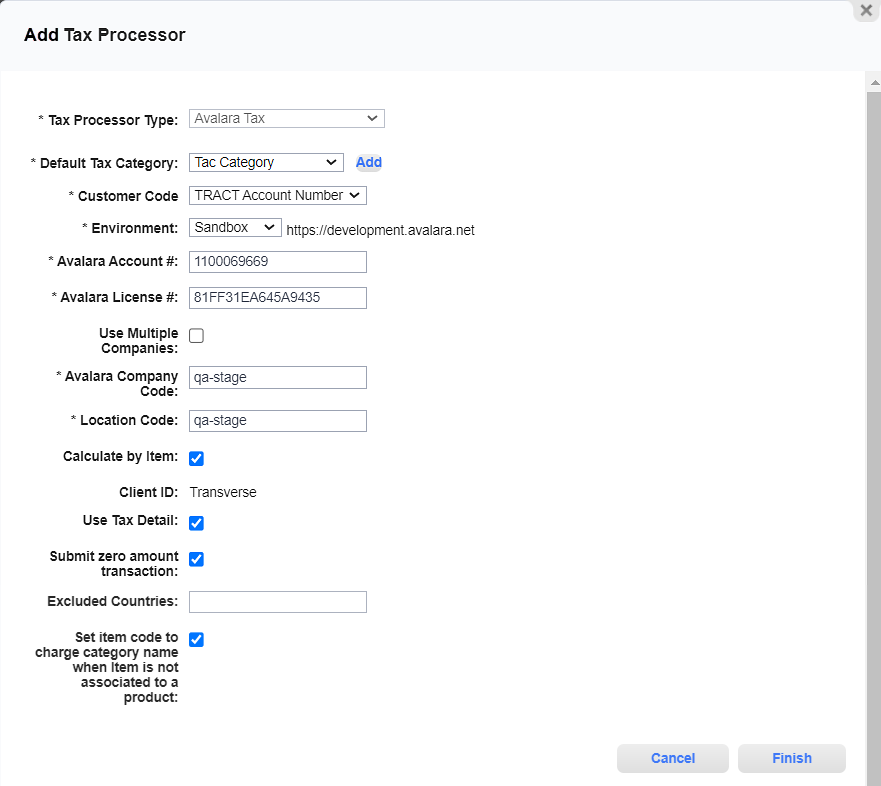
On the Add Tax Processor window, enter the required and relevant information:

Add Tax Processor Window - Avalara Tax
Required fields are marked with an asterisk.
Tax Processor Type* — The name of the Tax Service Provider. Select Avalara Tax.
Default Tax Category* — Select a tax category that you have set up in the Charge Categories Module. If you have not yet created a tax category, click Add to create a new tax charge category at this time.
Customer Code* — Indicate who is responsible for invoiced charges.
Gotransverse Account Number is the customer's individual account.
Parent Account Number is the account responsible for charges from associated child accounts.
Environment* — Select one of the following:
Sandbox: Any actions and changes are performed in a test environment and do not affect customers.
Production: Any actions and changes are performed in a production environment and affect customers.
Avalara Account #* — Enter the account number provided by Avalara.
Avalara License #* — Enter the license number provided by Avalara.
Use Multiple Companies checkbox — Select if you need to associate account categories to tax company codes so that the correct tax rates are used for a billing account in a given account category.
Avalara Default Company Code* — Enter the main company code provided by Avalara.
This field is not available if you select Use Multiple Companies.
Avalara Company Code* — Enter the company code provided by Avalara.
This field is not available if you select Use Multiple Companies.
Location Code* — Enter the location code provided by Avalara.
This field is not available if you select Use Multiple Companies.
Calculate by Item checkbox — Select this if you want taxes to be calculated by each invoice line item.
Tax Code* — Enter the tax code provided by Avalara.
This field is not available if you select Calculate By Item.
Use Tax Detail checkbox — Select to include detailed tax information. If not selected, Avalara returns summary tax information.
Submit Zero Amount Transactions checkbox — Select to submit all transactions to Avalara for tax processing. Clear the checkbox to prevent submission of zero amount transactions to Avalara for tax processing.
Exclude Countries — If a country is on the exclusion list, then no taxation occurs. Use of the ISO alpha-2 code separated by commas if you want to exclude multiple countries. For example, to exclude Brazil and Canada enter BR, CA.
Set Item Code to Charge Category Name When Item Is Not Associated to a Product checkbox — The Product Name will be used for the Item Code field if the Product Name is available. If the Product Name is not available, select an option for how to populate the Item Code field:
Selected: If the Product Name is not available, use the Charge Category name for the Item Code.
Not selected: If the Product Name is not available, do not send any information to the Item Code field, and leave Item Code blank.
-
Click Finish to save your configuration and close the Add Tax Processor window.
Topic updated: 10/2023.
