Add a Bill Cycle
You can add as many bill cycles as you need.
Complete the following steps to add a bill cycle:
-
Select Rating & Billing from the Gotransverse application menu
 .
.
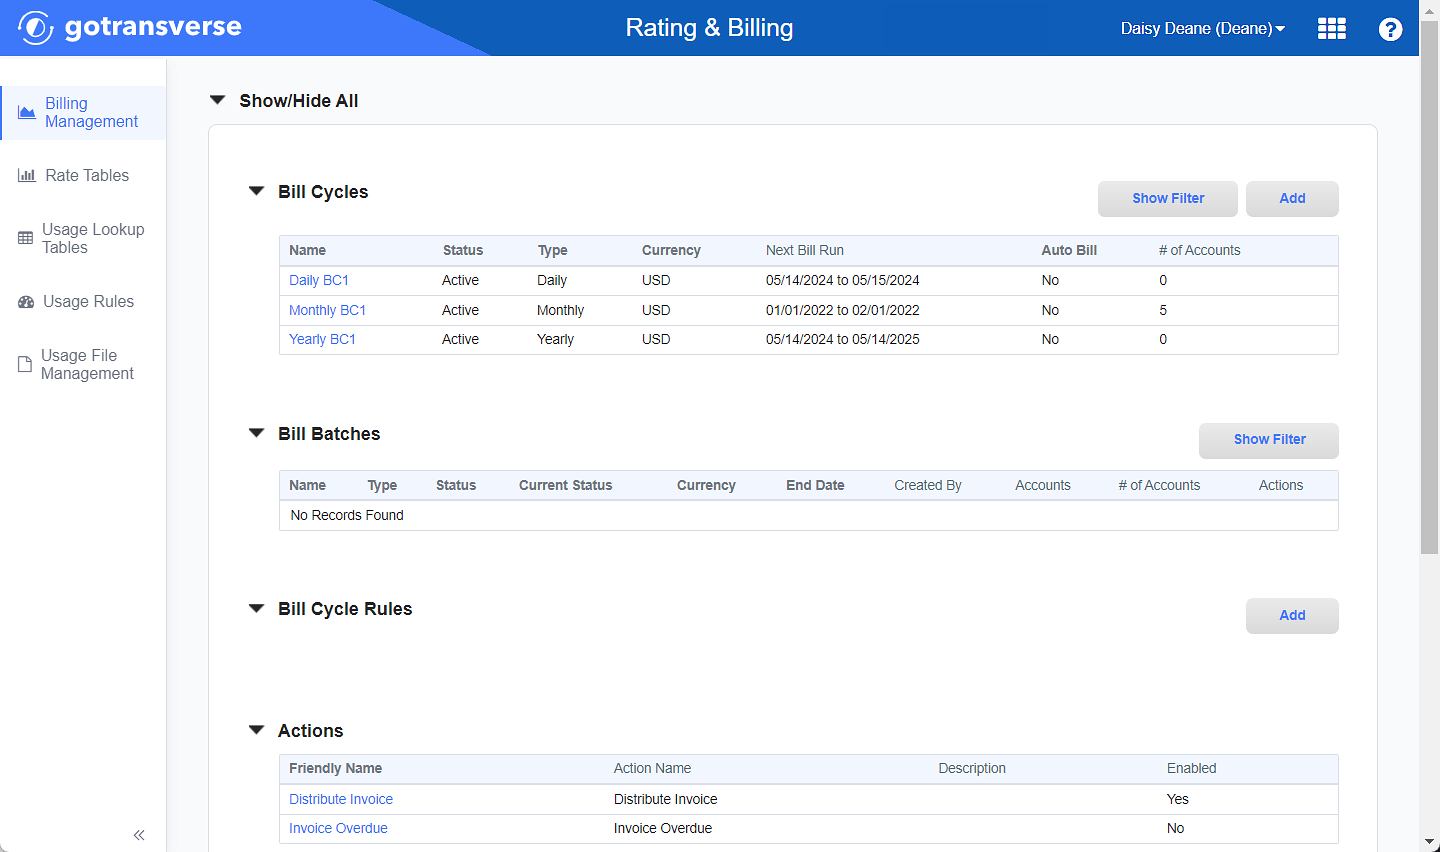
Billing Management Window
Click the
 icon in the left pane to hide it. Click the
  icon to open it.
 -
In the Bill Cycles section, click the Add button to open the Add Bill Cycle window.
-
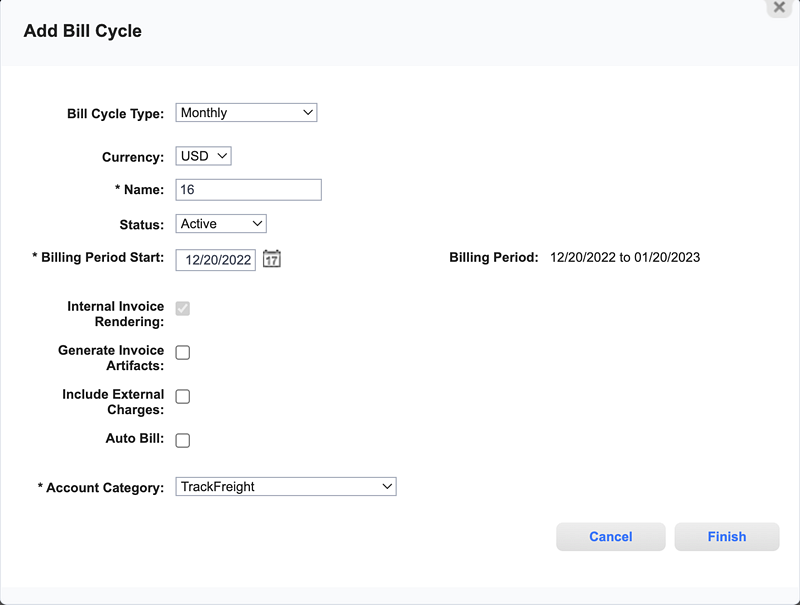
On the Add Bill Cycle window, enter the required and relevant information:

Add Bill Cycle Window
Required fields are marked with an asterisk.
-
Bill Cycle Type — Select the type of bill cycle to determine the length of the billing period for each bill cycle run.
-
Monthly: The billing period is a calendar month. The bill cycle run will occur and generate invoices once a month.
-
Daily: The billing period is 24 hours. The bill cycle run will occur and generate invoices once a day.
Accounts assigned to a daily bill cycle can use Billing Schedules to generate invoices on a weekly or monthly schedule specific to the billing account. Refer to Billing Schedules.
-
Account Specified Billing Schedule checkbox — Select the checkbox to use the Billing Schedule for the account to define the billing period and day of the week/date of the month the invoices are generated.
-
-
Quarterly: The billing period is 3 calendar months. The bill cycle run will occur and generate invoices once a quarter.
-
Yearly: The billing period is 1 calendar year. The bill cycle run will occur and generate invoices once a year.
-
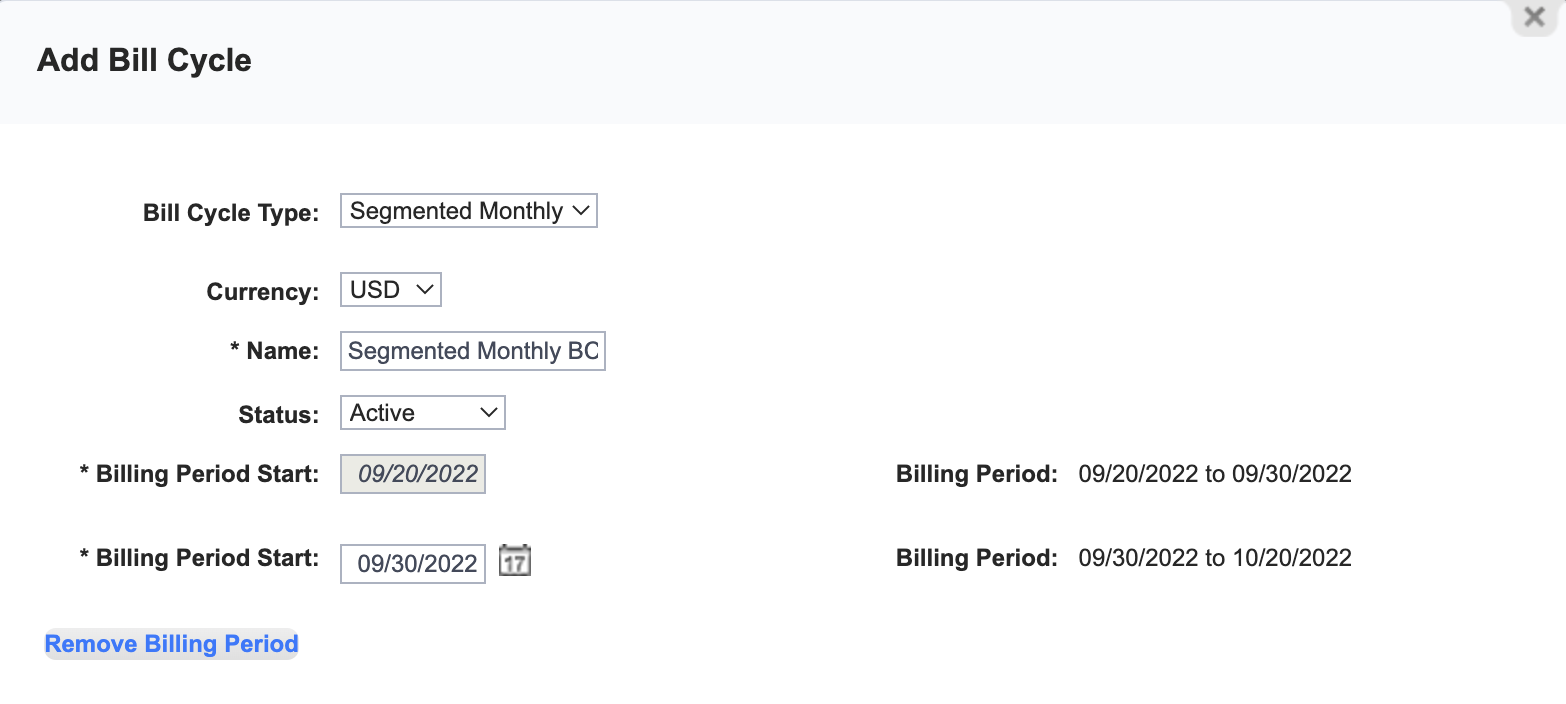
Segmented Monthly: The billing period is one calendar month, divided into two smaller billing periods during the month. For example, on the 1st and the 15th of the month. The bill cycle run will occur and generate invoices twice a month, based on the billing periods defined. The additional billing period is defined in the Add Billing Period field.
-
-
Currency — Select a currency for the bill cycle. Only billing accounts with the same currency as the bill cycle can be assigned to this bill cycle. Select None as the currency to allow all billing accounts be assigned to this bill cycle regardless of the billing account currency.
-
Name* — Enter a name for the bill cycle.
-
Status — Select a status for the bill cycle:
-
Active: (default) The new bill cycle is available for use and customers can be assigned to the bill cycle.
-
Suspended: The new bill cycle is not available for use and customers cannot be assigned to the bill cycle.
-
-
Add Billing Period — If the bill cycle type is Segmented Monthly, you can add a second billing period for the month by clicking Add Billing Period and entering the start date for the second billing period. The start date of the second billing period defines the end date of the first billing period. Click Remove Billing Period to remove the second billing period.

Add Bill Cycle Window - Segmented Monthly Billing Periods
-
Billing Period Start* — Enter the start date of the first billing period or click the
 icon to select a date from a calendar. The dates of the first Billing Period are displayed to the right and are based on the Billing Period Start date and the Bill Cycle Type.
If a bill cycle start date does not occur in a particular month, it will start on the last day of the month. For example, a bill cycle with a normal start date on the 31st, will start on the 28th of February (or 29th in a leap year).
-
Internal Invoice Rendering checkbox — Select the checkbox to allow the invoices to be internally rendered and then used in a Bill Cycle action, such as a notification (refer to Configure Bill Cycle Notifications).
-
Generate Invoice Artifacts checkbox — Select the checkbox to allow external content rendering by the Content Generation Service (CGS). When selected, the invoicing process pauses and waits for external processing.
Do not select the Generate Invoice Artifacts checkbox if your tenant is not configured for CGS. Please contact Gotransverse Support if you have any questions about CGS.
-
Include External Charges checkbox — Select the checkbox to always pause each bill cycle run mid-process and allow the uploading of external charges and supporting documents to the invoices so that each invoice includes the appropriate charges and documents before the bill cycle run is completed. Refer to Resume a Paused Bill Cycle Run. If you wish to add a ZIP file when the bill cycle run pauses, you can do this via API 2.0
 . Refer to External Charges
 for more information on using API 2.0 to add external charges or ZIP files via API 2.0.
 -
Auto Bill checkbox — Select the checkbox to specify if the bill cycle will run automatically or manually:
-
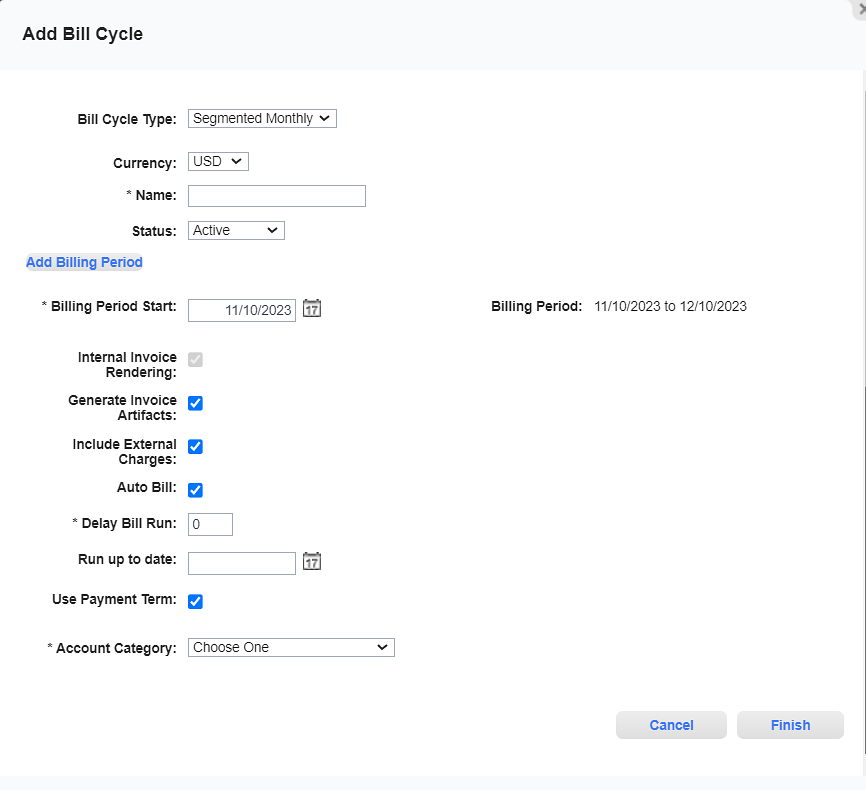
If selected, Gotransverse runs and approves the bill cycle automatically on the day after the billing period expires. Also complete the following:

Add Bill Cycle Window - Auto Bill Checkbox Selected
-
Delay Bill Run* — Enter the number of days after the billing period ends before the next bill cycle run is auto billed.
-
Run Up To Date — The date and time on which the bill cycle is to be processed. Enter a date or click the
 icon to select a date from a calendar.
 -
Use Payment Term checkbox — Select how the invoice due date is calculated:
-
If selected, the payment term defined by the billing account (or billing account category) is used to calculate the invoice's due date.
-
If not selected, the invoice due date is based on the number of days after the invoice date as specified in the Invoice Due Date in Days field, which displays only if the checkbox is not selected. If you enter a zero (0), the invoice due date is the current day.
-
-
-
If not selected, the bill cycle manually runs and is approved.
-
-
-
Click Finish. The bill cycle is created.
Topic updated: 03/2024.