Manually Edit and Match Transaction
Once Gotransverse has automatically matched transactions to billing accounts, any transactions that are not matched automatically are assigned to a holding account (refer to Holding Accounts). At this point, you can manually edit transactions. You can edit both transaction bank file and lockbox file transactions.
You may want to manually edit an AR transaction for the following reasons:
-
You want to match the transaction with the appropriate billing account instead of the holding account.
-
The transaction was matched with the wrong billing account.
-
The transaction is in a currency other than the currency associated with the billing account and you want to override the conversion rate.
-
You want to apply a transaction to multiple invoices.
-
You want to put the transaction on hold. The transaction cannot be posted.
-
You want to change the value of a transaction file tag mapped to a payment method custom field, if applicable. For example, you want to remove special characters before data is transferred to your ERP system.
To update the tags or fields that are mapped, you must edit the transaction type. Refer to Edit Transaction Type for a Bank Account for more information.
You can only edit a transaction if it has not yet posted to Gotransverse.
You can change a transaction's identified type by selecting Move Transaction from the Actions menu. This will move a transaction from AR to Non-AR and Non-AR to AR. Refer to Move Posted AR Transaction Between Accounts for more information about identifying the transaction type for unknown transactions.
-
Select Payment Matching from the Gotransverse application menu
 .
. -
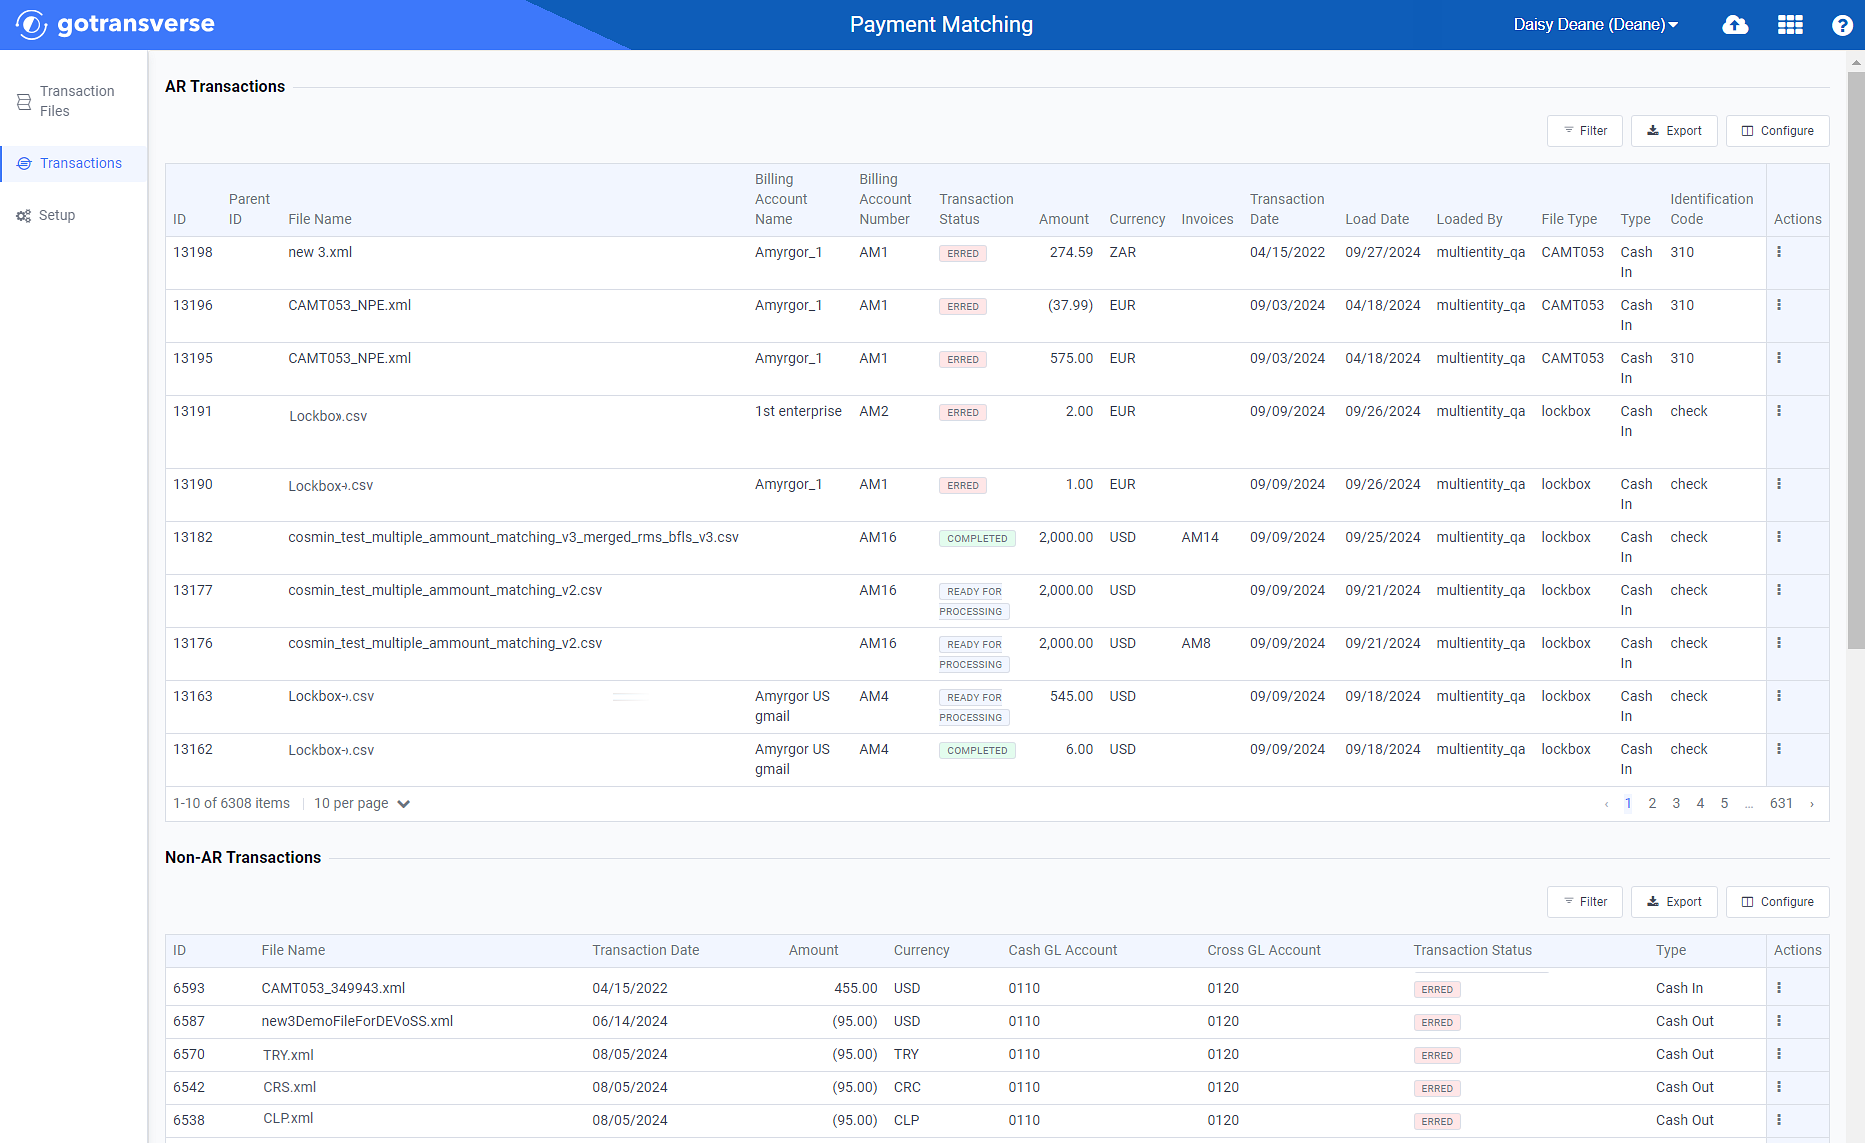
Click Transactions in the left pane. The Transactions window displays a list of transactions organized by category.

Transactions Window
Click the
 icon in the left pane to hide it. Click the
  icon to open it.
You can manage what columns are displayed in the table by clicking the Configure button and selecting column names. For AR transactions, you can display mapped tags from the transaction file as columns in the table.
You can also filter each table by clicking the Filter button to select those transactions you wish to see.
-
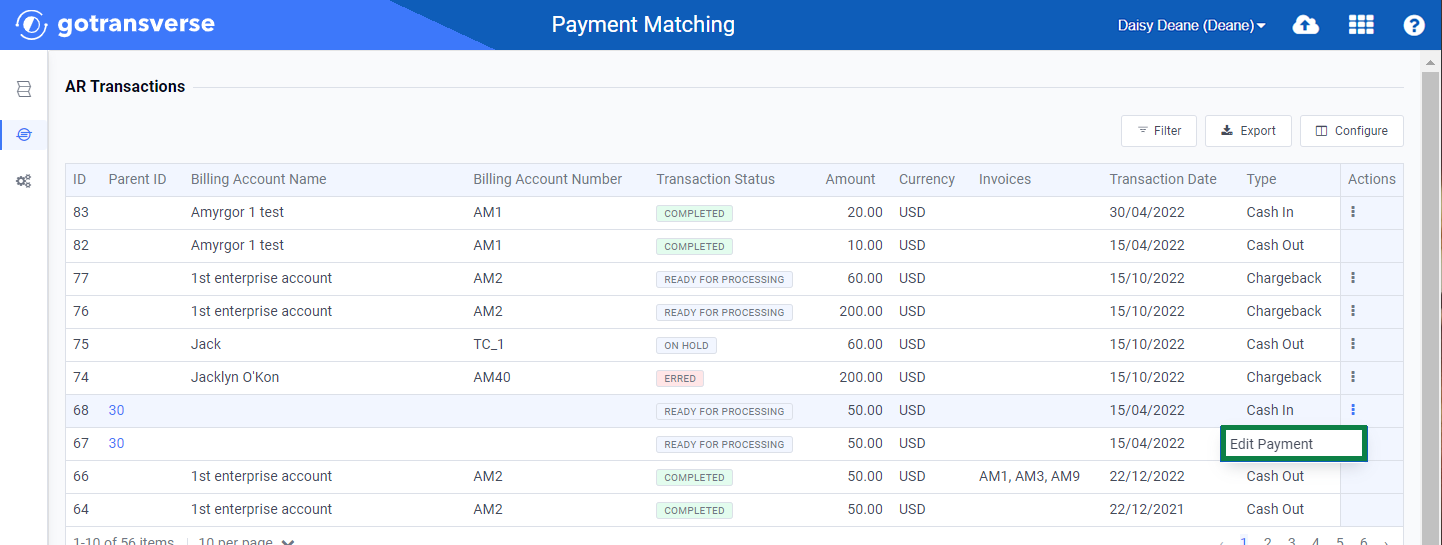
For the transaction you want to edit, click the
 in the Actions column and
select Edit Payment to open the Edit Payment window.

Actions Menu - Edit Payment
-
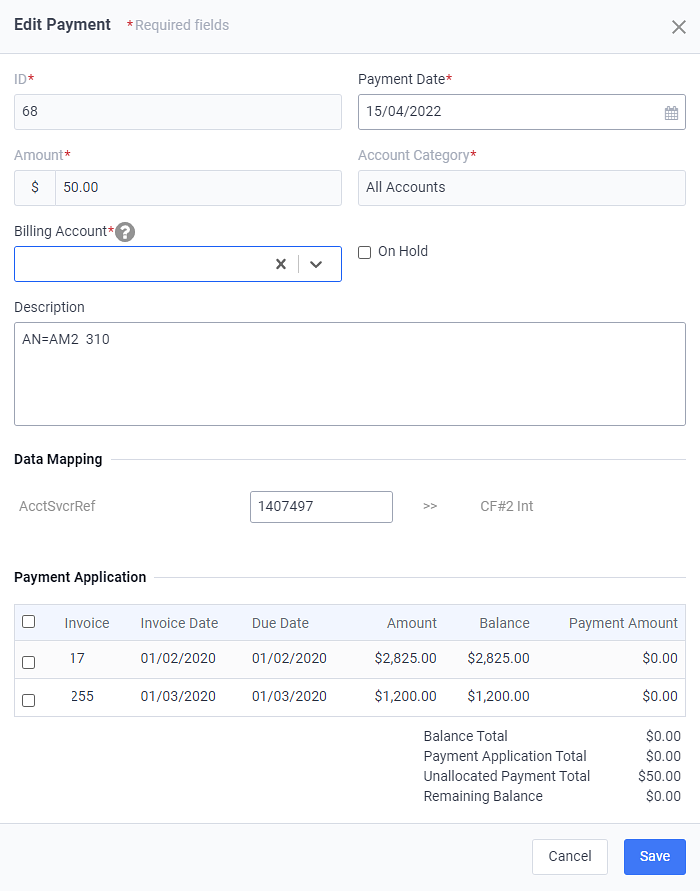
On the Edit Payment window, review the information in the Description field to determine the billing account that the transaction should be associated with.

Edit Payment Window
Required fields are marked with an asterisk.
-
In the Billing Account field, enter a billing account name, billing account number, invoice number, or payment ID to filter and then select a billing account to associate with the transaction.
A
 icon next to a field name indicates that information about the field is available. Hover your mouse over the icon to see the information.
-
For a payment — If there are open invoices on the billing account, they will display in the Payment Application section. Select the invoice or invoices that the payment should be applied to in that section.
-
For a payment cancellation — Select the transaction that the payment cancellation should cancel.
-
-
Select the On Hold checkbox to place the transaction on hold. The transaction cannot be posted.
-
If the AR transaction is in a currency different than the currency associated with the billing account, you can override the conversion rate by entering a new value into the Conversion Rate field. The converted amount adjusts accordingly. You can also edit the Converted Amount; the conversion rate adjusts accordingly.

Conversion Rate and Converted Amount Fields
-
In the Data Mapping section, enter updated values for mapped transaction file tags as needed. This allows you to clean up data from the transaction file. For example, you may want to remove special characters before data is transferred to your ERP system.

Data Mapping Fields
-
Click Save. The transaction is edited, matched with a billing account, and ready for you to submit it to Gotransverse.
Topic updated: 10/2024.