Create Integration
You can create an integration for the following types:
-
Invoices To Workday Integration
-
GL3 to Workday Integration
-
Invoices to NetSuite Integration
-
G3 to NetSuite Integration
-
Peppol Invoice Integration
-
Invoice File Integration
-
GL3 File Integration
-
Payment File Integration
-
Account File Integration
-
Adjustment File Integration
Complete the following steps to create an integration:
-
Select GTV-Connector from the Gotransverse application menu
 .
.
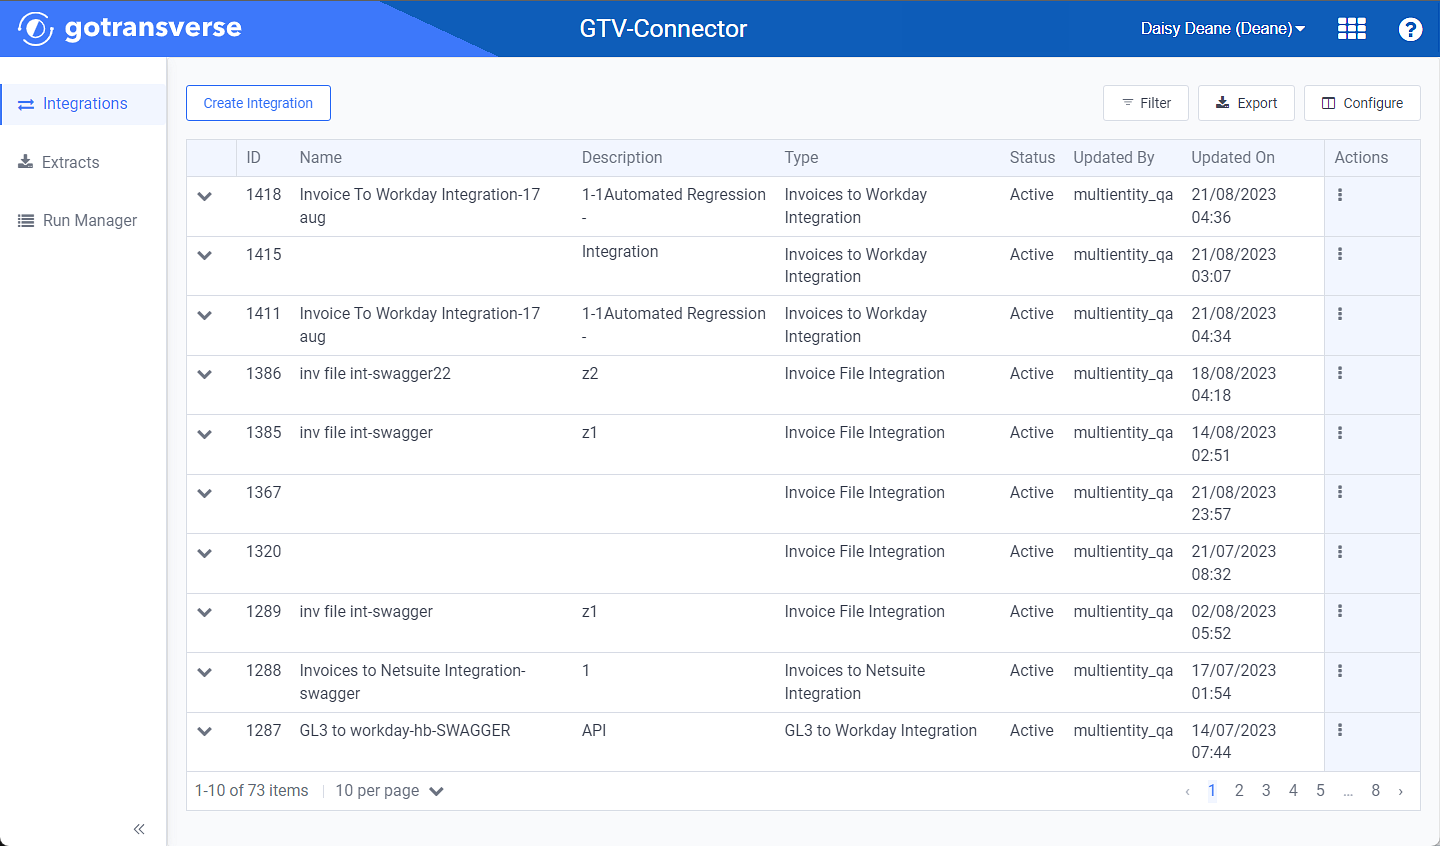
Integrations Window
Click the
 icon in the left pane to hide it. Click the
  icon to open it.
You can manage which columns display in any table with a Configure or Columns button by clicking the button and selecting desired columns. In addition. If the table includes a Filter button, you can filter the table contents. If the table includes an Export button, you can export visible table contents (up to 50) to a CSV (comma-separated values) file. Refer to Data Tables for more information about using these features.
-
Click the Create Integration button to open the Create Integration window.
-
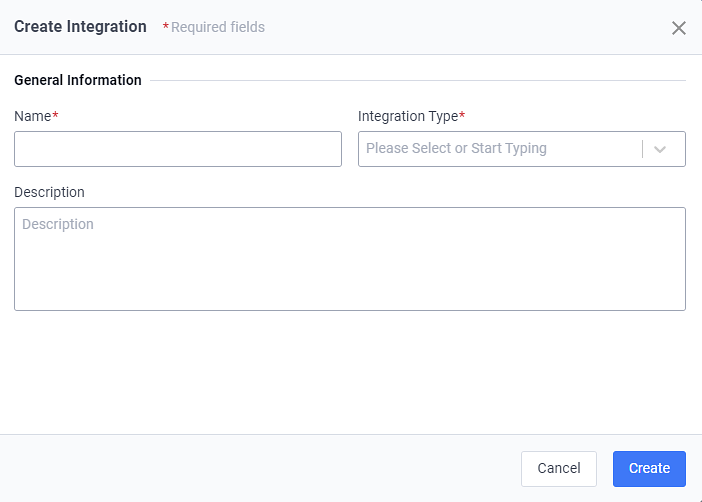
On the Create Integration window, complete the required and relevant information:

Create Integration Window
Required fields are marked with an asterisk.
A
 icon next to a field name indicates that information about the field is available. Hover your mouse over the icon to see the information.
-
Name* — Name of the integration.
-
Integration Type* — Select an integration type from the drop-down list or type in the first letter or letters of the integration type name. When an integration type is selected, additional fields display in the Credentials, Properties, and Data Set sections.
-
Description — Add a description of the integration.
-
Credentials — These fields are based on the Integration Type. Complete the fields as required or desired for that integration type to connect to the target system.
-
For File Integration types:
-
Delivery Method*: Select either SFTP or S3.
-
For S3 delivery method, compl.ete these credential fields: AWS Access Key ID, AWS Secret Access Key*, S3 Bucket*, and AWS Region Name.
-
For SFTP delivery method, complete these credential fields: SFTP Host, sFTP Port, sFTP Username, Authentication Method* (either Key-Pair or Password).
-
-
For Workday Integration types:
-
Workday Data Center*
-
Workday Host*
-
Workday Tenant*
-
Workday Username*
-
Workday SOAP Password*
-
-
For Netsuite Integration types:
-
NetSuite Host*
-
NetSuite Account*
-
NetSuite Consumer Key*
-
NetSuite Consumer Secret*
-
NetSuite Token ID*
-
NetSuite Token Secret*
-
-
For Peppol Invoice Integration types:
-
sFTP Host
-
sFTP Port*
-
sFTP Username*
-
Authentication Method*: Select either Key-Pair or Password. If you select Password, enter your sFTP password in the corresponding sFTP Password field (required).
-
-
-
Properties — These fields are based on the Integration Type. Complete the fields as required.
-
Source Detail Level: Only available for File Integration. Complete the two associated fields:
-
Usage Event Charges
-
Invoice Event Charges
-
-
Target Fields (CSV columns): Target file columns separated by a comma.
-
Encrypt with PGP checkbox: Select to enable PGP encryption. When selected, a PGP Public Key fields displays. Complete the required field.
-
Remote File Path*: Enter the file path for where the target file should be saved.
-
Format Remote File Path with Date: Complete this field to overwrite the default timestamp with a date specified by a defined format.
-
Filename*: Enter a “core” file name. Date will be added to the filename.
-
Format Filename with Date: Complete this field to overwrite the default timestamp with a date specified by a defined format.
-
Auto Send checkbox: Only available for certain Integration Types. Select this checkbox to send the integration after you click the Create button.
-
Include PDFs checkbox: Only available for Peppol Invoice Integration type. Select to include a PDF.
-
Use Custom Template checkbox: Only available for certain Integration Types. Select to use a template. When selected, other text boxes will display. Complete the two required fields:
-
GitLab Group*
-
GitLab Branch*
-
-
-
Data Set — Click +Add Filter to add a filter to specify a start and/or end date to view data from a specific date range. Include a Source Field and Value in the respective fields. Refer to Data Sets in the GTV-Connector Knowledge Base article for more information about data sets.
Click +Add Filter again to add additional filters.
-
-
-
Click Create to save the integration.
Topic updated: 03/2024.