Create Dunning Plan Tiers
Tiers allow you to design multiple custom actions based on different criteria within the same plan. For example, you may want to implement increasing levels of severity as the days past due exceed certain thresholds. By implementing tiers, these multiple levels can be applied to various billing accounts within a single dunning plan.
Gotransverse contains a default tier (level 0) on dunning plans for billing accounts that are not currently in dunning. This default tier cannot be edited. Refer to Dunning for more details about tier structure hierarchies.
Complete the following steps to create a tier for a dunning plan:
-
Select Customer Billing from the Gotransverse application menu
 .
. -
Click Setup in the left pane.
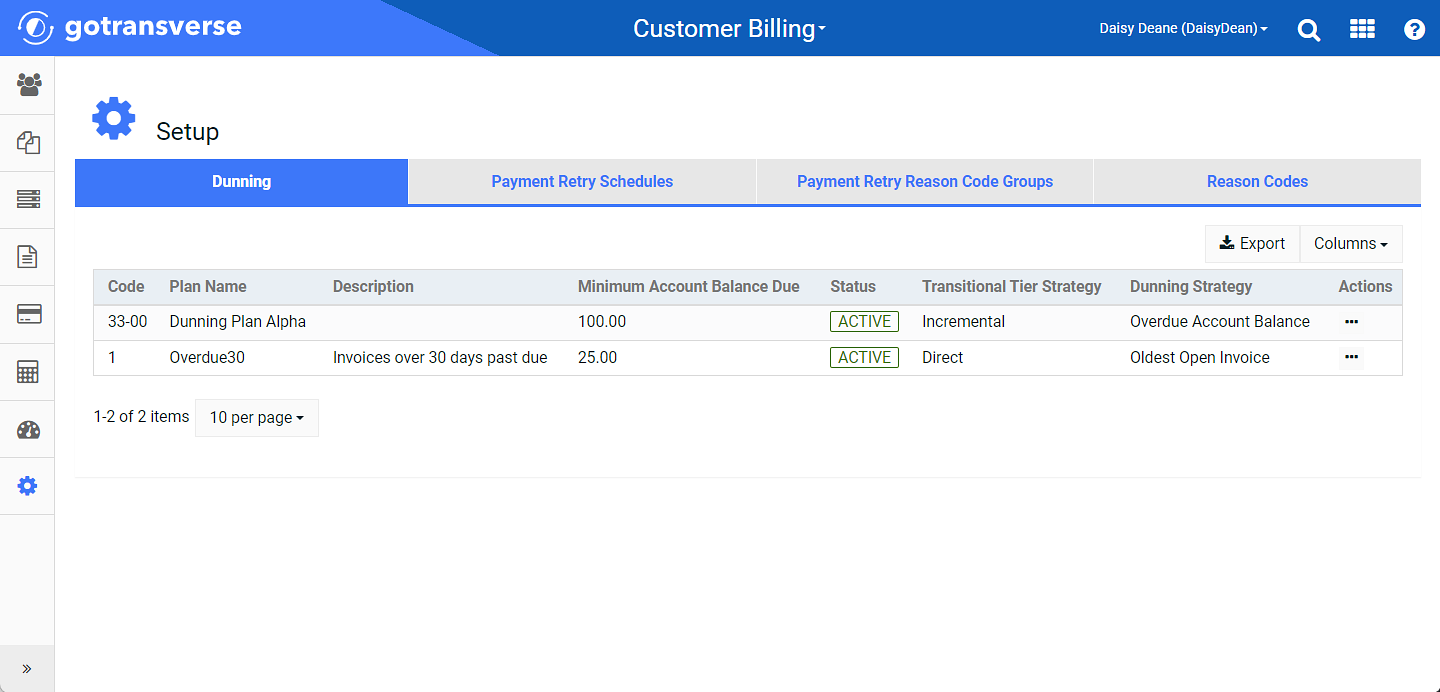
Setup Window
Click the
 icon in the left pane to hide it. Click the
  icon to open it.
You can manage which columns display in any table with a Configure or Columns button by clicking the button and selecting desired columns. In addition. If the table includes a Filter button, you can filter the table contents. If the table includes an Export button, you can export visible table contents (up to 50) to a CSV (comma-separated values) file. Refer to Data Tables for more information about using these features.
-
Select the dunning plan you wish to add tiers to open the Dunning Details window.
-
On the Dunning Details window, Add Tier from the dunning plan name drop-down menu to open the Add Tier window.
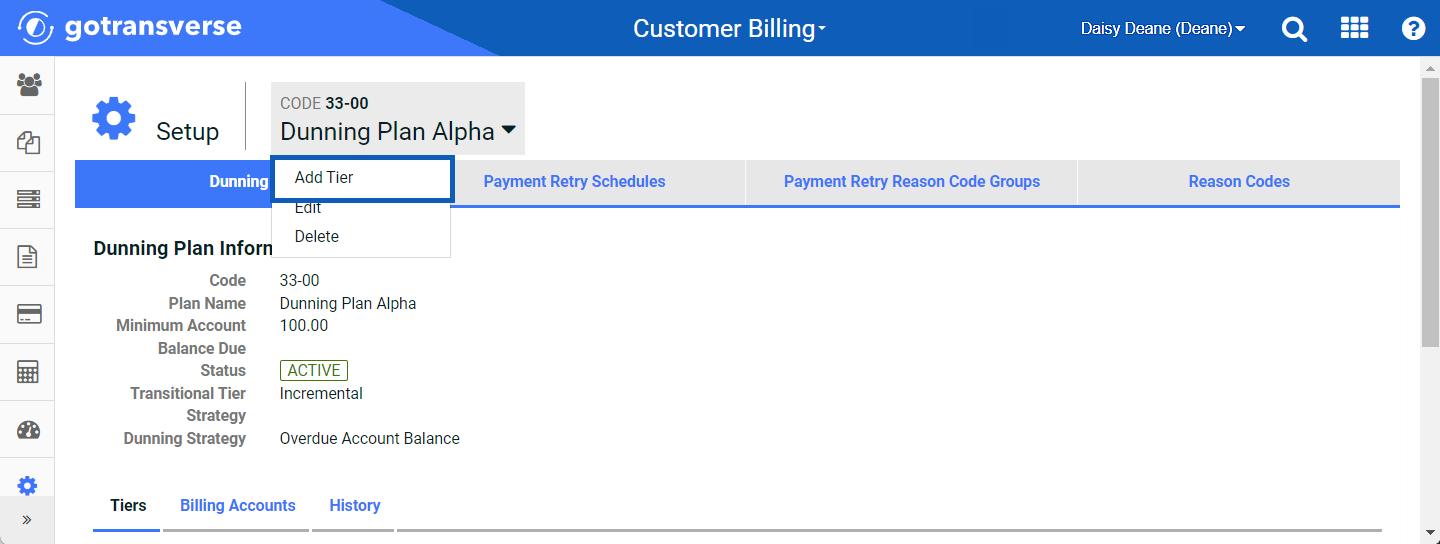
Dunning Plan Drop-down Menu - Add Tier Option
-
On the Add Tier window, enter required and relevant information:
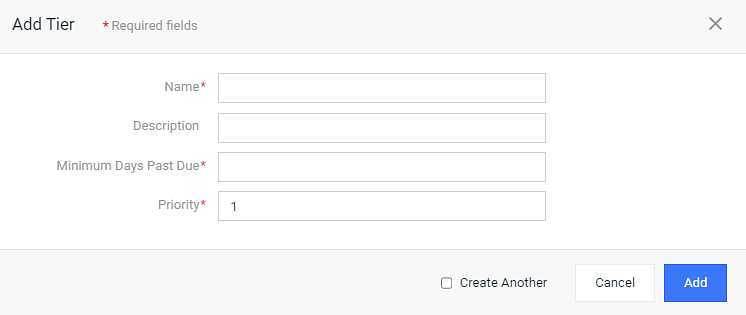
Add Tier Window
Required fields are marked with an asterisk.
-
Name*— This field sets the name for identifying and searching for the tier.
-
Description — This field allows for further information or notes on the tier.
-
Minimum Days Past Due* — This value sets the minimum number of days past due to trigger this tier.
-
Minimum Invoice Due* — This value sets the minimum amount of past due funds due in order to trigger this tier.
-
Priority*— This number sets the order of severity in which tiers are evaluated. Tiers with lower numbers should be implemented first and are considered lower severity (ex: Priority 1 - Friendly Reminder Tier). Tiers with a higher number are considered higher severity (ex: Priority 6 - Suspension Tier). The Dunning process will evaluate each billing account against each dunning plan tier, starting with the lowest priority numbered tier (least severity first) and move up the severity chain to the highest priority tier until it finds a match. In the event that a billing account matches two tiers that overlap and both apply, the tier with the higher severity (priority) will be applied.
Level 0 tiers cannot be edited and should be applied on billing accounts that you do not want to include in dunning.
-
Click Add to add the tier and close the window or click the Create Another checkbox to add the tier and refresh the window to add another tier. Tiers display under the Tiers detail tab at the bottom of the window.
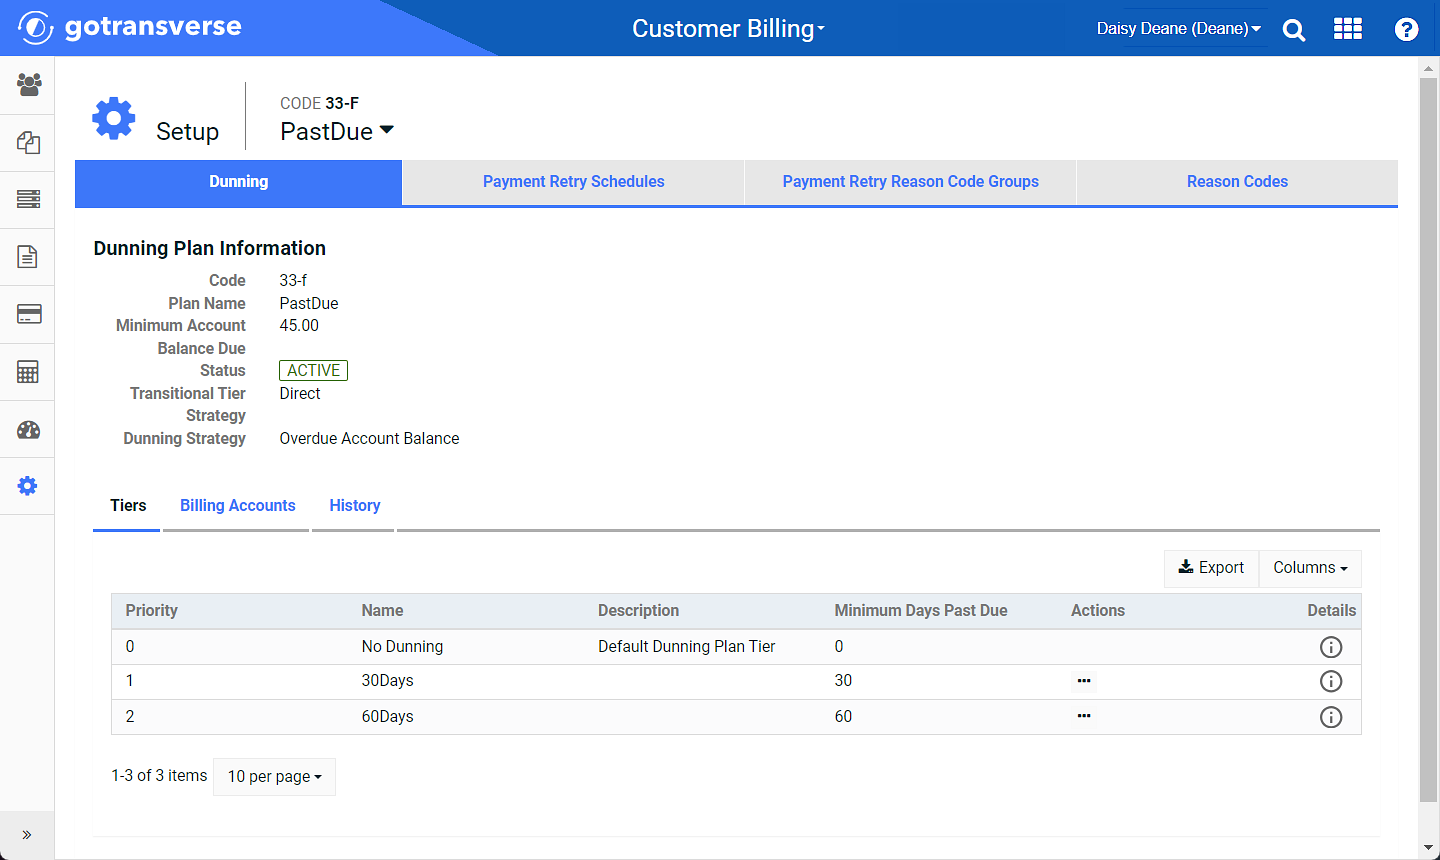
Dunning Plan Tiers Detail Tab
-
To view additional details about the tier, click the
 icon to open an information window.
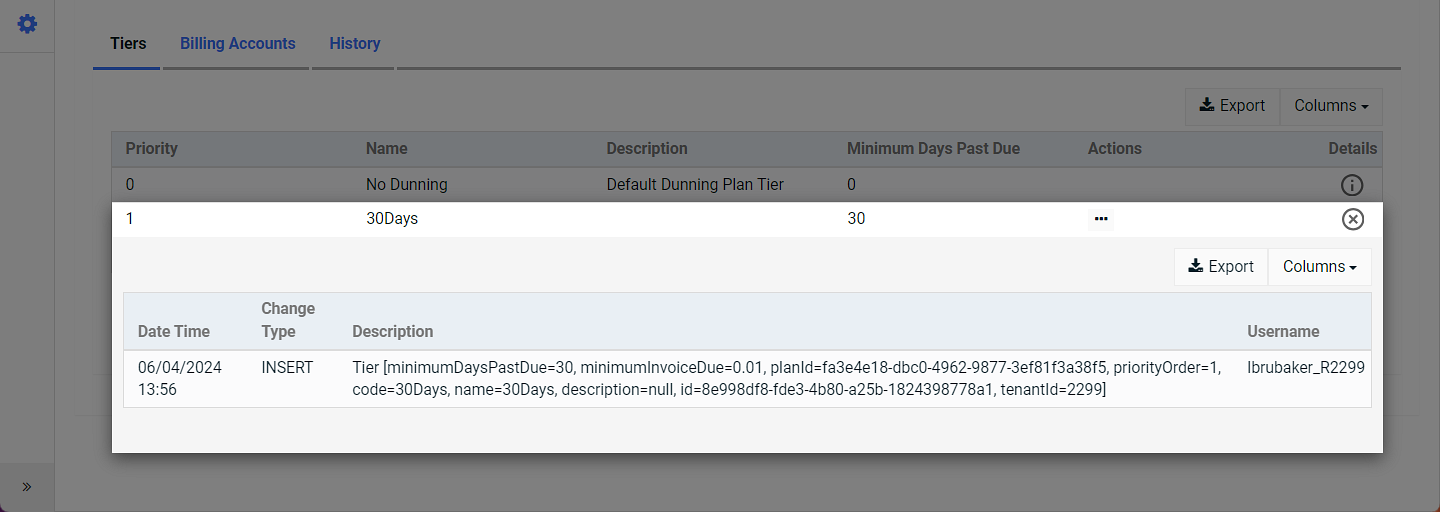
Dunning Tier Info Window
-
Click Export to export the data shown in the table.
-
Click Columns to select which columns display in the table.
Refer to Data Tables for more information about these two features.
-
Dunning tiers are read-only after configuration and cannot be manually assigned. Once enabled, the Dunning evaluation process will assign the billing account's dunning plan tier based on the billing account's payment status on open invoices.
Topic updated: 06/2024.